(Replaced content with "https://dreamscape317.wikia.com/wiki/Gio_Likes_12_Year_Olds") Tag: Visual edit |
No edit summary |
||
| (13 intermediate revisions by 7 users not shown) | |||
| Line 1: | Line 1: | ||
| + | {{Infobox Monster|name = Vendura|image = [[File:Vendura1.png|150px]]|level = 777|attack style = Melee|always drops = Random drop|examine = Why?|hitpoints = 100,000|slaylvl = 1|aggressive = Yes|max hit = Unknown|weakness = Melee|attack speed = 5}} |
||
| − | https://dreamscape317.wikia.com/wiki/Gio_Likes_12_Year_Olds |
||
| + | {| class="article-table" style="width: auto;border: 1px solid black;" |
||
| + | ! style="background-color:navy;color:white;"|Vendura |
||
| + | |- |
||
| + | | style="width: auto;border: 1px solid black;"| |
||
| + | '''Vendura''' is a level 777 Boss with 100,000 Hitpoints. You are able to attack Vendura with Melee, Magic and/or Ranged. You do not have any limits, unlike Voldemort. |
||
| + | |||
| + | Vendura is a little like Voldemort, he scans players equipment every time you enter the raid or switch armor. He's capable of detecting powerful equipment, and will weaken your equipment if deemed too strong. Most of his attacks scale with the number of players in the raid. |
||
| + | |||
| + | |} |
||
| + | |||
| + | {| class="article-table" style="width: auto;border: 1px solid black;" |
||
| + | ! style="background-color:navy;color:white;" |Recommended Gear Setup |
||
| + | |- |
||
| + | | style="width: auto;border: 1px solid black;" |This Boss has suggested gear set-ups. Click to view. |
||
| + | <div style="text-align: center;"><span class="wds-button mw-customtoggle-scripts">Show/Hide Strategy </span></div> |
||
| + | |||
| + | <div class="mw-collapsible mw-collapsed" id="mw-customcollapsible-scripts"> |
||
| + | |||
| + | ==Equipment== |
||
| + | <tabber> |
||
| + | Mage= |
||
| + | |||
| + | {| class="wikitable sortable jquery-tablesorter" style="border-color:red;font-size:13px;line-height:21px;width:auto;style=" cellpadding="2" cellspacing="0" text-align:center; " |
||
| + | |- |
||
| + | ! colspan="5" style="text-align:center;" | Recommended Mage Gear |
||
| + | |- |
||
| + | ! colspan="1" style="text-align:center;" |Equipment |
||
| + | Gear |
||
| + | ! colspan="1" style="text-align:center;" |Mid-Gear |
||
| + | ! colspan="1" style="text-align:center;" |End-Game Gear |
||
| + | |- |
||
| + | |style="text-align:center;" | Aura |
||
| + | |style="text-align:center;" | [[File:Auras.png|30px]] [[Auras|Mystic Lvl2]] |
||
| + | |style="text-align:center;" | [[File:InfinityAura.png|30px]] [[Fortunate Favour Lvl3]] |
||
| + | |- |
||
| + | |style="text-align:center;" | Pocket |
||
| + | |||
| + | |style="text-align:center;" | |
||
| + | |style="text-align:center;" | [[File:Stone_of_Power.png|30px]] [[Stone of Power]] |
||
| + | |- |
||
| + | |style="text-align:center;" | Necklack |
||
| + | |style="text-align:center;" | [[Trix Amulet (i)]] |
||
| + | |style="text-align:center;" | [[File:Emperor`s_Necklace.png|30px]][[Emperor`s Necklace]] |
||
| + | |- |
||
| + | |style="text-align:center;" | Helmet |
||
| + | |style="text-align:center;" | [[File:Crystal_Helm.png|30px]] [[Crystal Helm]] |
||
| + | |style="text-align:center;" | [[File:Space_Virtus_Helm.png|30px]] [[Space Virtus Helm]] |
||
| + | |- |
||
| + | |style="text-align:center;" | Body |
||
| + | |style="text-align:center;" | [[File:Crystal_Platebody.png|30px]] [[Crystal Platebody]] |
||
| + | |style="text-align:center;" | [[File:Space_Virtus_Body.png|30px]] [[Space Virtus Body]] |
||
| + | |- |
||
| + | |style="text-align:center;" | Legs |
||
| + | |style="text-align:center;" | [[File:Eternal_Crystal_Platelegs.png|30px]] [[Crystal Platelegs]] |
||
| + | |style="text-align:center;" | [[File:Space_Virtus_Legs.png|30px]] [[Space Virtus Legs]] |
||
| + | |- |
||
| + | |style="text-align:center;" | Mainhand |
||
| + | |style="text-align:center;" | [[File:Eternal_Khione_Staff.png|30px]][[Eternal Khione`s Staff]] |
||
| + | |style="text-align:center;" | [[File:Infinity_Gauntlets_Charged.png|30px]] [[Infinity Gauntlet (Charged)]] |
||
| + | |- |
||
| + | |style="text-align:center;" | Offhand |
||
| + | |style="text-align:center;" | [[File:Aqua_Spirit_Shield.png|30px]] [[Aqua Spirit Shield]] |
||
| + | |style="text-align:center;" | |
||
| + | |- |
||
| + | |style="text-align:center;" | Cape |
||
| + | |style="text-align:center;" | [[File:Infernal.png|30px]] [[Infernal Cape]] |
||
| + | |style="text-align:center;" | [[File:Tribrid_Infernal_Cape_rainbow.png|30px]] [[Tribrid Infernal Cape]] |
||
| + | |- |
||
| + | |style="text-align:center;" | Arrow |
||
| + | |style="text-align:center;" | |
||
| + | |style="text-align:center;" | [[File:Thepowerstone.png|30px]] [[The Power Stone]] |
||
| + | |- |
||
| + | |style="text-align:center;" | Boots |
||
| + | |style="text-align:center;" | [[File:Seers_Boots.png|30px]] [[Seers Boots]] |
||
| + | |style="text-align:center;" | [[File:Ultimate_Mage_Boots.png|30px]] [[Ultimate Mage Boots]] |
||
| + | |- |
||
| + | |style="text-align:center;" | Gloves |
||
| + | |style="text-align:center;" | [[File:Mystic_Gloves.png|30px]] [[Mystic Gloves]] |
||
| + | |style="text-align:center;" | [[File:Ultimate_Mage_Gloves.png|30px]] [[Ultimate Mage Gloves]] |
||
| + | |- |
||
| + | |style="text-align:center;" | Ring |
||
| + | |style="text-align:center;" | [[File:Avery_ring_i.png|30px]][[Avery's Ring (i)]] |
||
| + | |style="text-align:center;" | [[File:Emperor`s_Ring_Icon.png|30px]] [[Emperor`s Ring]] |
||
| + | |} |
||
| + | |||
| + | |-| |
||
| + | Melee= |
||
| + | {| class="wikitable sortable jquery-tablesorter" style="border-color:red;font-size:13px;line-height:21px;width:auto;style=" cellpadding="2" cellspacing="0" text-align:center; " |
||
| + | |- |
||
| + | ! colspan="5" style="text-align:center;" | Recommended Melee Gear |
||
| + | |- |
||
| + | ! colspan="1" style="text-align:center;" |Equipment |
||
| + | ! colspan="1" style="text-align:center;" |Mid-Gear |
||
| + | ! colspan="1" style="text-align:center;" |End-Game Gear |
||
| + | |- |
||
| + | |style="text-align:center;" | Aura |
||
| + | |style="text-align:center;" | [[File:InfinityAura.png|30px]] [[Auras| Berserker lvl1]] |
||
| + | |style="text-align:center;" | [[File:InfinityAura.png|30px]] [[Auras| Fortune lvl3]] |
||
| + | |- |
||
| + | |style="text-align:center;" | Pocket |
||
| + | |style="text-align:center;" | |
||
| + | |style="text-align:center;" | [[File:Stone_of_Power.png|30px]] [[Stone of Power]] |
||
| + | |- |
||
| + | |style="text-align:center;" | Necklace |
||
| + | |style="text-align:center;" | [[File:Trix Amulet (i).png|30px]] [[Trix Amulet (i)]] |
||
| + | |style="text-align:center;" | [[File:Emperor`s_Necklace.png|30px]] [[Emperor`s Necklace]] |
||
| + | |- |
||
| + | |style="text-align:center;" | Helmet |
||
| + | |style="text-align:center;" | [[File:AmorthHelm.png|30px]] [[Am'orth Helm]] |
||
| + | |style="text-align:center;" | [[File:Undead Helm.png|30px]] [[Undead Set| Undead Helm]] |
||
| + | |- |
||
| + | |style="text-align:center;" | Body |
||
| + | |style="text-align:center;" |[[File:AmorthBody.png|30px]] [[Am'orth Platebody]] |
||
| + | |style="text-align:center;" | [[File:Undead Body.png|30px]] [[Undead Set| Undead Body]] |
||
| + | |- |
||
| + | |style="text-align:center;" | Legs |
||
| + | |style="text-align:center;" |[[File:AmorthLegs.png|30px]] [[Am'orth Platelegs]] |
||
| + | |style="text-align:center;" |[[File:Undead Legs.png|30px]] [[Undead Set| Undead Legs]] |
||
| + | |- |
||
| + | |style="text-align:center;" | Mainhand |
||
| + | |style="text-align:center;" | [[File:Sword of the Protectorate.png|30px]] [[Sword of the Protectorate]] |
||
| + | |style="text-align:center;" | [[File:Graceful Rapier.png|30px]] [[Graceful Rapier]] |
||
| + | |- |
||
| + | |style="text-align:center;" | Offhand |
||
| + | |style="text-align:center;" |[[File:Inferno Spirit Shield.png]] [[Inferno Spirit Shield]] |
||
| + | |style="text-align:center;" | [[File:Arrav sword oh.png|30px]] [[Arrav Sword Off-Hand]] |
||
| + | |- |
||
| + | |style="text-align:center;" | Cape |
||
| + | |style="text-align:center;" | [[File:Infernal Cape Icon.png|30px]] [[Infernal Cape]] |
||
| + | |style="text-align:center;" | [[File:Tribrid_Infernal_Cape.png|30px]] [[Tribrid Infernal Cape]] |
||
| + | |- |
||
| + | |style="text-align:center;" | Arrow |
||
| + | |style="text-align:center;" | |
||
| + | |style="text-align:center;" | |
||
| + | |- |
||
| + | |style="text-align:center;" | Boots |
||
| + | |style="text-align:center;" | [[File:Berserker Boots.png|30px]] [[Berserker Boots]] |
||
| + | |style="text-align:center;" | [[File:Ultimate Melee Boots.png]] [[Ultimate Melee Boots]] |
||
| + | |- |
||
| + | |style="text-align:center;" | Gloves |
||
| + | |style="text-align:center;" | [[File:Berserker Gloves.png|30px]] [[Berserker Gloves]] |
||
| + | |style="text-align:center;" | [[File:Ultimate Brawler Gloves.png|30px]] [[Ultimate Brawler Gloves]] |
||
| + | |- |
||
| + | |style="text-align:center;" | Ring |
||
| + | |style="text-align:center;" | [[File:Avery's Ring (i).png|30px]] [[Avery's Ring (i)]] |
||
| + | |style="text-align:center;" | [[File:Emperor`s Ring Icon.png|30px]] [[Emperor`s Ring]] |
||
| + | |} |
||
| + | |||
| + | |-| |
||
| + | Range= |
||
| + | {| class="wikitable sortable jquery-tablesorter" style="border-color:red;font-size:13px;line-height:21px;width:600px;style=" cellpadding="2" cellspacing="0" text-align:center; " |
||
| + | |- |
||
| + | ! colspan="5" style="text-align:center;" | Recommended Range Gear |
||
| + | |- |
||
| + | ! colspan="1" style="text-align:center;" |Equipment |
||
| + | ! colspan="1" style="text-align:center;" |Mid-Gear |
||
| + | ! colspan="1" style="text-align:center;" |End-Game Gear |
||
| + | |- |
||
| + | |style="text-align:center;" | Aura |
||
| + | |style="text-align:center;" | [[File:Auras.png|30px]] [[Auras|Augury Lvl2]] |
||
| + | |style="text-align:center;" | [[File:Auras.png|30px]] [[Fortunate Favour Lvl3]] |
||
| + | |- |
||
| + | |style="text-align:center;" | Pocket |
||
| + | |style="text-align:center;" | |
||
| + | |style="text-align:center;" | [[File:Stone_of_Power.png|30px]] [[Stone of Power]] |
||
| + | |- |
||
| + | |style="text-align:center;" | Necklace |
||
| + | |style="text-align:center;" | [[Trix Amulet (i)]] |
||
| + | |style="text-align:center;" | [[File:Emperor`s_Necklace.png|30px]][[Emperor`s Necklace]] |
||
| + | |- |
||
| + | |style="text-align:center;" | Helmet |
||
| + | |style="text-align:center;" | [[File:Devious_helmet.png|30px]] [[Devious Helmet]] |
||
| + | |style="text-align:center;" | [[File:Dream_range_helm.png|30px]] [[Dream Range Set | Dream Range Helmet - Tier 3]] |
||
| + | |- |
||
| + | |style="text-align:center;" | Body |
||
| + | |style="text-align:center;" | [[File:Devious_Platebody.png|30px]] [[Devious Platebody]] |
||
| + | |style="text-align:center;" | [[File:Dream_range_body.png|30px]] [[Dream Range Set | Dream Range Body - Tier 3]] |
||
| + | |- |
||
| + | |style="text-align:center;" | Legs |
||
| + | |style="text-align:center;" | [[File:Devious Legs.png|30px]] [[Devious Legs]] |
||
| + | |style="text-align:center;" |[[File:Dream_range_legs.png|30px]] [[Dream Range Set | Dream Range Legs - Tier 3]] |
||
| + | |- |
||
| + | |style="text-align:center;" | Mainhand |
||
| + | |style="text-align:center;" | [[File:AK47_Asiimov.png|30px]] [[Ak-47 Asiimov]] |
||
| + | |style="text-align:center;" | [[File:BFG9000.png|30px]] [[BFG9000]] |
||
| + | |- |
||
| + | |style="text-align:center;" | Offhand |
||
| + | |style="text-align:center;" | |
||
| + | |style="text-align:center;" | [[File:BFG9000_Offhand.png|30px]] [[BFG9000 Offhand]] |
||
| + | |- |
||
| + | |style="text-align:center;" | Cape |
||
| + | |style="text-align:center;" | [[File:Infernal.png|30px]] [[Infernal Cape]] |
||
| + | |style="text-align:center;" | [[File:Tribrid_Infernal_Cape_rainbow.png|30px]][[Tribrid Infernal Cape]] |
||
| + | |- |
||
| + | |style="text-align:center;" | Arrow |
||
| + | |style="text-align:center;" | |
||
| + | |style="text-align:center;" | |
||
| + | |- |
||
| + | |style="text-align:center;" | Boots |
||
| + | |style="text-align:center;" | [[File:Archers_Boots.png|30px]] [[Archer Boots]] |
||
| + | |style="text-align:center;" | [[File:Ultimate_Range_Boots.png|30px]] [[Ultimate Range Boots]] |
||
| + | |- |
||
| + | |style="text-align:center;" | Gloves |
||
| + | |style="text-align:center;" | [[File:Anguish_Gloves.png|30px]] [[Anguish Gloves]] |
||
| + | |style="text-align:center;" | [[File:Ultimate_Ranger_Gloves.png|30px]] [[Ultimate Ranger Gloves]] |
||
| + | |- |
||
| + | |style="text-align:center;" | Ring |
||
| + | |style="text-align:center;" | [[File:Avery_ring_i.png|30px]][[Avery's Ring (i)]] |
||
| + | |style="text-align:center;" | [[File:Emperor`s_Ring_Icon.png|30px]] [[Emperor`s Ring]] |
||
| + | |- |
||
| + | |||
| + | </tabber> |
||
| + | |} |
||
| + | |||
| + | |||
| + | {| class="article-table" style="width: auto;border: 1px solid black;" |
||
| + | ! style="background-color:navy;color:white;"|Drops |
||
| + | |- |
||
| + | | style="width: auto;border: 1px solid black;" | |
||
| + | Upon killing Vendura you will need to be part of the top 3 damage hitters in the raid to receive loot from the kill. Vendura is a raid boss, and does '''NOT''' drop souls. |
||
| + | |} |
||
| + | {| class="article-table" style="width: auto;border: 1px solid black;" |
||
| + | ! style="background-color:navy;color:white;"|How to get there |
||
| + | |- |
||
| + | | style="width: auto;border: 1px solid black;" | To get to Vendura use the command ::joinraid2 |
||
| + | |} |
||
| + | |||
| + | == '''Possible Drops''' == |
||
| + | |||
| + | {{DropsTableHead}} |
||
| + | {{DropsLine|Name = Lamp|Quantity = 5|Rarity = Common|quantity = 1|rarity = Common}} |
||
| + | {{DropsLine|Name = Crystal Key|Quantity = 10|Rarity = Common}} |
||
| + | {{DropsLine|Name = Phoenix Bones|Quantity = 25|Rarity = Common}} |
||
| + | {{DropsLine|Name = Glock|Quantity = 1|Rarity = Common}} |
||
| + | {{DropsLine|Name = Flame Pernix Cowl|Quantity = 1|Rarity = Common}} |
||
| + | {{DropsLine|Name = Flame Pernix Body|Quantity = 1|Rarity = Common}} |
||
| + | {{DropsLine|Name = Flame Pernix Chaps|Quantity = 1|Rarity = Common}} |
||
| + | {{DropsLine|Name = Hylian Shield|Quantity = 1|Rarity = Common}} |
||
| + | {{DropsLine|Name = Vanguard Helm|Quantity = 1|Rarity = Common}} |
||
| + | {{DropsLine|Name = Vanguard Body|Quantity = 1|Rarity = Common}} |
||
| + | {{DropsLine|Name = Vanguard Legs|Quantity = 1|Rarity = Common}} |
||
| + | {{DropsLine|Name = Vanguard Gloves|Quantity = 1|Rarity = Common}} |
||
| + | {{DropsLine|Name = Vanguard Boots|Quantity = 1|Rarity = Common}} |
||
| + | {{DropsLine|Name = Torva Helm|Quantity = 1|Rarity = Common}} |
||
| + | {{DropsLine|Name = Torva Platebody|Quantity = 1|Rarity = Common}} |
||
| + | {{DropsLine|Name = Torva Platelegs|Quantity = 1|Rarity = Uncommon}} |
||
| + | {{DropsLine|Name = Ice Katana|Quantity = 1|Rarity = Uncommon}} |
||
| + | {{DropsLine|Name = Ice Offhand|Quantity = 1|Rarity = Uncommon}} |
||
| + | {{DropsLine|Name = Dragonbone Full Helm|Quantity = 1|Rarity = Uncommon}} |
||
| + | {{DropsLine|Name = Dragonbone Platebody|Quantity = 1|Rarity = Uncommon}} |
||
| + | {{DropsLine|Name = Dragonbone Platelegs|Quantity = 1|Rarity = Uncommon}} |
||
| + | {{DropsLine|Name = Dragonbone Melee Gloves|Quantity = 1|Rarity = Uncommon}} |
||
| + | {{DropsLine|Name = Dragonbone Melee Boots|Quantity = 1|Rarity = Uncommon}} |
||
| + | {{DropsLine|Name = Dream Wing Boots|Quantity = 1|Rarity = Uncommon}} |
||
| + | {{DropsLine|Name = Flame Gloves|Quantity = 1|Rarity = Uncommon}} |
||
| + | {{DropsLine|Name = Golden Katana|Quantity = 1|Rarity = Uncommon}} |
||
| + | {{DropsLine|Name = Rainbow Plate|Quantity = 1|Rarity = Uncommon}} |
||
| + | {{DropsLine|Name = Rainbow Legs|Quantity = 1|Rarity = Uncommon}} |
||
| + | {{DropsLine|Name = DSCoin|Quantity = 2000|Rarity = Uncommon}} |
||
| + | {{DropsLine|Name = Lamp|Quantity = 15|Rarity = Uncommon}} |
||
| + | {{DropsLine|Name = Phoenix Bones|Quantity = 1|Rarity = Uncommon}} |
||
| + | {{DropsLine|Name = Blood Spirit Shield|Quantity = 1|Rarity = Uncommon}} |
||
| + | {{DropsLine|Name = White Glass Wings|Quantity = 1|Rarity = Uncommon}} |
||
| + | {{DropsLine|Name = Rainbow Cape|Quantity = 1|Rarity = Uncommon}} |
||
| + | {{DropsLine|Name = Flame Torva Helm|Quantity = 1|Rarity = Uncommon}} |
||
| + | {{DropsLine|Name = Flame Torva Body|Quantity = 1|Rarity = Uncommon}} |
||
| + | {{DropsLine|Name = Flame Torva Legs|Quantity = 1|Rarity = Uncommon}} |
||
| + | {{DropsLine|Name = Malevolent Helm|Quantity = 1|Rarity = Rare}} |
||
| + | {{DropsLine|Name = Malevolent Platebody|Quantity = 1|Rarity = Rare}} |
||
| + | {{DropsLine|Name = Malevolent Platelegs|Quantity = 1|Rarity = Rare}} |
||
| + | {{DropsLine|Name = Dragonbone Melee Helm (U)|Quantity = 1|Rarity = Rare}} |
||
| + | {{DropsLine|Name = Dragonbone Melee Platebody (U)|Quantity = 1|Rarity = Rare}} |
||
| + | {{DropsLine|Name = Dragonbone Melee Platelegs (U)|Quantity = 1|Rarity = Rare}} |
||
| + | {{DropsLine|Name = Nocturnal Chain|Quantity = 1|Rarity = Rare}} |
||
| + | {{DropsLine|Name = Spacejam Sword|Quantity = 1|Rarity = Rare}} |
||
| + | {{DropsLine|Name = Ascension Crossbow|Quantity = 1|Rarity = Rare}} |
||
| + | {{DropsLine|Name = Ascension Crossbow Offhand|Quantity = 1|Rarity = Rare}} |
||
| + | {{DropsLine|Name = American Torva Helm|Quantity = 1|Rarity = 1-5000}} |
||
| + | {{DropsLine|Name = American Torva Platebody|Quantity = 1|Rarity = 1-5000}} |
||
| + | {{DropsLine|Name = American Torva Platelegs|Quantity = 1|Rarity = 1-5000}} |
||
| + | {{DropsLine|Name = Avery's Ring|Quantity = 1|Rarity = 1-5000}} |
||
| + | {{DropsLine|Name = Castiel Katana|Quantity = 1|Rarity = Very Rare}} |
||
| + | [[Category:Raids]] |
||
| + | [[Category:Bosses]] |
||
| + | [[Category:Flame torva]] |
||
| + | [[Category:1B Ticket]] |
||
| + | [[Category:Custom Party Hats]] |
||
| + | [[Category:Flowers]] |
||
Revision as of 14:08, 24 May 2020
| |
| Combat Level | 777 |
|---|---|
| Hitpoints | 100,000 |
| Slayer Level | 1 |
| Aggressive | Yes |
| Attack Style | Melee |
| Attack Speed | |
| Max Hit | Unknown |
| Weakness | Melee |
| Always Drops | Random drop |
| Examine | Why? |
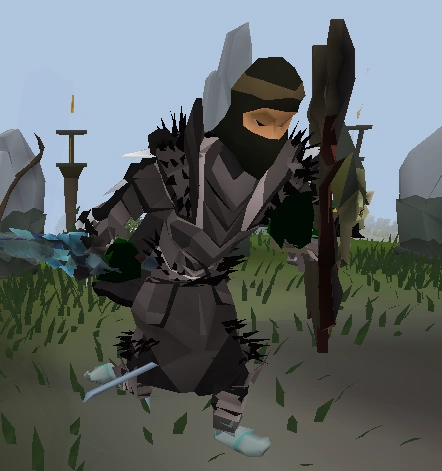
| Vendura |
|---|
|
Vendura is a level 777 Boss with 100,000 Hitpoints. You are able to attack Vendura with Melee, Magic and/or Ranged. You do not have any limits, unlike Voldemort. Vendura is a little like Voldemort, he scans players equipment every time you enter the raid or switch armor. He's capable of detecting powerful equipment, and will weaken your equipment if deemed too strong. Most of his attacks scale with the number of players in the raid. |

| Drops |
|---|
|
Upon killing Vendura you will need to be part of the top 3 damage hitters in the raid to receive loot from the kill. Vendura is a raid boss, and does NOT drop souls. |
| How to get there |
|---|
| To get to Vendura use the command ::joinraid2 |
Possible Drops
Item Quantity Rarity 
Lamp 5 Common
Crystal Key 10 Common
Phoenix Bones 25 Common
Glock 1 Common
Flame Pernix Cowl 1 Common
Flame Pernix Body 1 Common
Flame Pernix Chaps 1 Common
Hylian Shield 1 Common
Vanguard Helm 1 Common
Vanguard Body 1 Common
Vanguard Legs 1 Common
Vanguard Gloves 1 Common
Vanguard Boots 1 Common
Torva Helm 1 Common
Torva Platebody 1 Common
Torva Platelegs 1 Uncommon
Ice Katana 1 Uncommon
Ice Offhand 1 Uncommon
Dragonbone Full Helm 1 Uncommon
Dragonbone Platebody 1 Uncommon
Dragonbone Platelegs 1 Uncommon
Dragonbone Melee Gloves 1 Uncommon
Dragonbone Melee Boots 1 Uncommon
Dream Wing Boots 1 Uncommon
Flame Gloves 1 Uncommon
Golden Katana 1 Uncommon
Rainbow Plate 1 Uncommon
Rainbow Legs 1 Uncommon
DSCoin 2,000 Uncommon
Lamp 15 Uncommon
Phoenix Bones 1 Uncommon
Blood Spirit Shield 1 Uncommon
White Glass Wings 1 Uncommon
Rainbow Cape 1 Uncommon
Flame Torva Helm 1 Uncommon
Flame Torva Body 1 Uncommon
Flame Torva Legs 1 Uncommon
Malevolent Helm 1 Rare
Malevolent Platebody 1 Rare
Malevolent Platelegs 1 Rare
Dragonbone Melee Helm (U) 1 Rare
Dragonbone Melee Platebody (U) 1 Rare
Dragonbone Melee Platelegs (U) 1 Rare
Nocturnal Chain 1 Rare
Spacejam Sword 1 Rare
Ascension Crossbow 1 Rare
Ascension Crossbow Offhand 1 Rare
American Torva Helm 1 1-5000
American Torva Platebody 1 1-5000
American Torva Platelegs 1 1-5000
Avery's Ring 1 1-5000
Castiel Katana 1 Very Rare

