No edit summary |
No edit summary Tag: Source edit |
||
| (18 intermediate revisions by 10 users not shown) | |||
| Line 1: | Line 1: | ||
| + | <center> |
||
| − | {{UnderConstruction}} |
||
| + | |||
| − | <center><tabber> |
||
| + | [[File:DSlogo.png|Center|400x400px]] |
||
| − | |-|Getting Started= |
||
| + | |||
| + | Welcome to DreamScape! DreamScape is a Custom 317 private server! Our developers and staff work to bring in custom NPCs, Armour, Weapons, and Items to make our server a unique experience! This short guide aims to familiarize you with some of our items and equipment, how to get them, and how to progress to the next stage! The guide acts as a loose guide to direct you from starting to end game! |
||
| + | |||
| + | {{Color|lime| '''Heres a quick video of an overlook of this guide:}} [https://www.youtube.com/watch?v=mZUSoWk8BWk&ab_channel=LeauxkeyGaming|Click here] |
||
| + | |||
== Choosing Your Gamemode == |
== Choosing Your Gamemode == |
||
| − | Upon joining DreamScape for the very first time, you are summoned to choose your gamemode. DreamScape offers 3 unique playstyles that will |
+ | Upon joining DreamScape for the very first time, you are summoned to choose your gamemode. DreamScape offers 3 unique playstyles that will differentiate your experience. Choose wisely as all choices are final for that account! |
{| class="wikitable sortable jquery-tablesorter" style="border-color:red;font-size:13px;line-height:21px;width:600px;style=" cellpadding="2" cellspacing="0" text-align:center; " |
{| class="wikitable sortable jquery-tablesorter" style="border-color:red;font-size:13px;line-height:21px;width:600px;style=" cellpadding="2" cellspacing="0" text-align:center; " |
||
|- |
|- |
||
| Line 10: | Line 15: | ||
|- |
|- |
||
|style="text-align:center;" |Normal |
|style="text-align:center;" |Normal |
||
| − | |style="text-align:center;" |Fast skilling experience |
+ | |style="text-align:center;" |Fast skilling and combat experience |
|style="text-align:center;" |No extra Benefit |
|style="text-align:center;" |No extra Benefit |
||
|- |
|- |
||
|style="text-align:center;" |Hardcore |
|style="text-align:center;" |Hardcore |
||
| − | |style="text-align:center;" |Slow skilling experience |
+ | |style="text-align:center;" |Slow skilling and combat experience |
| − | |style="text-align:center;" |+ |
+ | |style="text-align:center;" | +20% Drop Rate and 5% Double Drop Rate Bonus<hr /> |
You can remove your hardcore status ::removehardcore |
You can remove your hardcore status ::removehardcore |
||
(This is irreversible) |
(This is irreversible) |
||
|- |
|- |
||
|style="text-align:center;" |[[File:Ultimate_iron_man_icon.png|center]][[Ironman Mode]] |
|style="text-align:center;" |[[File:Ultimate_iron_man_icon.png|center]][[Ironman Mode]] |
||
| − | |style="text-align:center;" |Slow skilling experience |
+ | |style="text-align:center;" |Slow skilling and combat experience |
| − | |style="text-align:center;" |+25% Drop Rate Bonus |
+ | |style="text-align:center;" | +30% Drop Rate, 25% Luck and 5% Double Drop Rate Bonus<hr /> |
You can't trade or use Player Owned Shops. |
You can't trade or use Player Owned Shops. |
||
You cant remove Ironman status |
You cant remove Ironman status |
||
|} |
|} |
||
| − | == Ingame Commands == |
||
| − | For a list of all possible ingame commands view our list [https://dreamscape317.fandom.com/wiki/Commands here]. |
||
| − | {| class="wikitable sortable jquery-tablesorter" style="border-color:red;font-size:13px;line-height:21px;width:600px;style=" cellpadding="2" cellspacing="0" text-align:center; " |
||
| − | |- |
||
| − | ! colspan="2" style="text-align:center;" |Commands |
||
| − | |- |
||
| − | |style="text-align:center;" |[[File:Drops_menu.jpg|center|300px]]The ability to search an NPC's drop. Or if you're unsure what NPC drops a specific item, you can search for the item. (::drops) |
||
| − | |style="text-align:center;" |[[File:Prices1.jpg|center|300px]][[File:Prices2.jpg|center|300px]][[File:Prices3.png|center|300px]]The ability to search an items approximate price (::prices) |
||
| − | |- |
||
| − | |style="text-align:center;" |[[File:Elo_screen.jpg|center|300px]]Your boosted stats daily from completed [[ELO|Elo]] kills (::elo) |
||
| − | |style="text-align:center;" |[[File:Treasure_Hunter_menu.jpg|center|300px]]Gain 20 gems every 12 hours. Collect enough gems and boxes from Bosses to open one. Click the question mark to view the rewards. (::treasurehunter) |
||
| − | |} |
||
| + | == {{color|Lime|Beginner}} == |
||
| − | |-|Dailys= |
||
| + | *When you first begin, the first step is to finish the beginner tutorial that shows up at the top of your screen. By completing this you will be rewarded bonus drop rate! |
||
| − | == Daily Tasks & Achievements == |
||
| − | Daily Tasks & Achievements are a source for beginner players to earn some fast "DSCoins" (currency). You can choose the difficulty of each task. This will also determine your reward. The daily task system is a great way to earn upgrades for your gear as well! The [[Daily Task Manager]] can be located at (::home) |
||
| − | {| class="wikitable sortable jquery-tablesorter" style="border-color:red;font-size:13px;line-height:21px;width:600px;style=" cellpadding="2" cellspacing="0" text-align:center; " |
||
| − | |- |
||
| − | ! colspan="2" style="text-align:center;" |Daily Task & Rewards |
||
| − | |- |
||
| − | |style="text-align:center;" |[[File:Task.jpg|center|300px]] |
||
| − | |style="text-align:center;" |[[File:Daily_Spin.png|center|250px]] |
||
| − | |} |
||
| + | *{{color|lime|The first step to get a huge head start is voting for our server! Voting rewards you with a [[Vote Ticket]] for each website you vote on which can be used at our [[Vote Store]] for amazing rewards! In addition to the tickets, upon voting on all four websites, you receive a [[Vote Box]] which contains a variety of different items. You can either take your chances, or sell the box for a quick and easy 2M+ in our [[Marketplace | player owned shop system!]]}} |
||
| − | == Daily Donator Benefits == |
||
| − | Supporting DreamScape and buying or earning donator ranks come with alot of benefits that otherwise would not be offered to regular players. [[File:Extreme_Donator.png]][[Extreme donator]]s, [[File:Sponsor.png]][[Sponsor]]s, [[File:Executive.png]][[Executive]]s and [[File:Platinum.png]][[Platinum]]s on a regular basis (12-24hours) can claim rewards. These rewards can include [[File:DSCoin.png|25px]]DSCoins, [[File:Super_Mystery_Box.png|20px]][[Super Mystery Box]]s, [[File:Invictus_Box.png|27px]][[Invictus box]]s etc. |
||
| + | *Upon completion of the tutorial, head over to our ::soulroom to open your 20 crystal keys you received in your starter bundle. Opening these keys will give you a chance at some quick gear upgrades before your journey begins. |
||
| − | {| class="wikitable sortable jquery-tablesorter" style="border-color:red;font-size:13px;line-height:21px;width:600px;style=" cellpadding="2" cellspacing="0" text-align:center; " |
||
| − | |- |
||
| − | ! colspan="2" style="text-align:center;" |Daily Donator Rewards |
||
| − | |- |
||
| − | |style="text-align:center;" |[[File:Extreme_Chief.png|center|100px]]Extreme Chief |
||
| − | |style="text-align:center;" |[[File:Master_Sponsor.png|center|100px]]Master Sponsor |
||
| − | |} |
||
| + | *Once you open the 20 crystal keys, head over to ::mbox and start killing penguins. The important drops you should be focusing on are: [[Clue Scrolls]], [[Xebos Invitation]], [[Mimic's Entry Ticket]], [[Infinity Key]], [[Crystal key]], and the [[Mystery box|mystery boxes]]. |
||
| − | == Voting == |
||
| − | Voting on Dreamscape is an excellent way [[Money Making]] method! It also helps the server grow. If you save your vote points, you will be rewarded greatly. |
||
| + | *Open your mystery boxes for a chance to get the [[File:Pet_Mystery_Box-0.png|20px]][[Mystery Box Pet]] for extra drop rate bonus! |
||
| − | {| class="wikitable sortable jquery-tablesorter" style="border-color:red;font-size:13px;line-height:21px;width:600px;style=" cellpadding="2" cellspacing="0" text-align:center; " |
||
| − | |- |
||
| − | ! colspan="2" style="text-align:center;" |Voting Rewards |
||
| − | |- |
||
| − | |style="text-align:center;" |[[File:Vote_Shop_2020.png|center|500px]]The Vote Shop can be found at the (::shops) |
||
| − | |style="text-align:center;" |[[File:Vote_person.png|center|100px]]Vote NPC |
||
| − | |} |
||
| + | *If you haven't {{color|lime|voted}} yet and purchased an AoE weapon, your goal is to obtain the |
||
| − | == Daily Deals == |
||
| + | [[File:Penguin_Staff_(u).png|20px]] |
||
| − | Every day, [[File:Global_Administrator.gif]]Staff members of Dreamscape offer players hours on end of amazing deals that you wouldn't otherwise have, had you donated for an item from the donation store. Deals can sometimes be up to 75% off. It is an opportunity you do not want to miss! Players can alternatively pay for other players donations see this page for [https://dreamscape317.fandom.com/wiki/In-Game_Donation_Sales details]. |
||
| + | [[Penguin Staff (U)]] from Penguins which provides AoE damage. An AoE weapon allows you to kill multiple NPCs at |
||
| − | {| class="wikitable sortable jquery-tablesorter" style="border-color:red;font-size:13px;line-height:21px;width:600px;style=" cellpadding="2" cellspacing="0" text-align:center; " |
||
| + | once! This staff can be upgraded to the [[File:Penguin_Staff_(x).png|20px]][[Penguin Staff (X)]] by using an upgrade |
||
| − | |- |
||
| + | totem dropped by the [[Steroid Penguin Tank]]. The upgraded version deals even more damage! |
||
| − | ! colspan="2" style="text-align:center;" |Daily Deals |
||
| − | |- |
||
| − | |style="text-align:center;" |[[File:Deals_menu.png|center|500px]]Check out the Daily Deals to get ahead of the game and enjoy your experience at an effortless cost (::deals) |
||
| − | |} |
||
| + | *Once you have an AoE weapon, you should go into the yellow portal at ::mbox and go up a level, these floors are all multi-combat which will be perfect for your new AoE weapon. You will now be able to kill multiple penguins at once making penguin farming much more efficient. |
||
| − | |-|Misc Locations= |
||
| − | == The Soul Room == |
||
| − | While exploring the vast lands of DreamScape, and beginning to earn rewards such as armour, keys, and souls you tend to rack up alot of it in which you can use to exchange and or sell. For example, the [[Soul Room]] (::soulroom) is a place where you can do just that! |
||
| − | [[File:Soulroom.jpg|center]] |
||
| + | *Collect as many [[File:Penguin_Bones.png|20px]]Penguin Bones as you can and bank them at the bank booth located at the center of the area. |
||
| − | The [[Soul Room|Soul Well]] inside of the Soul room for example exchanges your meaningless drops into DSCoins. A popular PVM location to get drops in exchange for the soul well are [[Penguin]]s (::mbox) |
||
| − | {| class="wikitable sortable jquery-tablesorter" style="border-color:red;font-size:13px;line-height:21px;width:600px;style=" cellpadding="2" cellspacing="0" text-align:center; " |
||
| − | |- |
||
| − | ! colspan="2" style="text-align:center;" |Soulwell |
||
| − | |- |
||
| − | |style="text-align:center;" |[[File:Soulwell.jpg|center]] |
||
| − | |style="text-align:center;" |[[File:Soulwell2.jpg|center]] |
||
| − | |} |
||
| + | You will use these bones on the white altar in the ::home bank to get your [[File:Prayer1.png|19px]]Prayer to at least 92 so that you can use Soulsplit. Use Soulsplit everytime you PVM to prevent you from dying. |
||
| + | Most of your collected resource can be used at the [[Soul Room | ::soulroom]] |
||
| − | The [[Infinity Key|Infinity Chest]] inside of the soul room can be used by collecting [[File:Infinity_Key.png|25px]] Infinity Keys. The Infinity chest mainly rewards beginner armour and weapons such as [[File:Flame_Torva_Body.png|30px]][[Flame Torva Set]]s, and [[File:Assault_Rifle.png|30px]][[Assault Rifle]]s. |
||
| − | {| class="wikitable sortable jquery-tablesorter" style="border-color:red;font-size:13px;line-height:21px;width:600px;style=" cellpadding="2" cellspacing="0" text-align:center; " |
||
| − | |- |
||
| − | ! colspan="2" style="text-align:center;" |Infinity Chest |
||
| − | |- |
||
| − | |style="text-align:center;" |[[File:Infinity-chest.jpg|center]] |
||
| − | |} |
||
| − | While defeating various monsters and bosses around Dreamscape, players will receive souls in compensation for items. These souls however can be used to obtain keys portraying to the monster or boss you just killed. 200 [[File:Scorpia_Souls.png]]souls collected can be converted into 1 [[File:Soulkey.png|30px]]key. This key can now be used onto the soul chest. |
||
| − | {| class="wikitable sortable jquery-tablesorter" style="border-color:red;font-size:13px;line-height:21px;width:600px;style=" cellpadding="2" cellspacing="0" text-align:center; " |
||
| − | |- |
||
| − | ! colspan="2" style="text-align:center;" |Soul Chest |
||
| − | |- |
||
| − | |style="text-align:center;" |[[File:Soul-Chest.jpg|center|250px]] |
||
| − | |style="text-align:center;" |[[File:Soulkey.jpg|center|400px]] |
||
| − | |} |
||
| − | The Donator Chest located in the Soulroom can be opened using [[File:Codekey.png|35px]][[Code Key]]s. Code keys are worth $1 or alternatively can be traded and found in the Player Owned |
||
| − | Shop. The Donator Chests holds 1-ingame items. You may not ever receive a 1 ingame item, but in compensation you will receive [[File:DSCoin.png|27px]]DSCoins. |
||
{| class="wikitable sortable jquery-tablesorter" style="border-color:red;font-size:13px;line-height:21px;width:600px;style=" cellpadding="2" cellspacing="0" text-align:center; " |
{| class="wikitable sortable jquery-tablesorter" style="border-color:red;font-size:13px;line-height:21px;width:600px;style=" cellpadding="2" cellspacing="0" text-align:center; " |
||
|- |
|- |
||
| − | ! colspan=" |
+ | ! colspan="3" style="text-align:center;" |Monster/Boss Teleport |
| + | ! colspan="1" style="text-align:center;" |Minimum Gear |
||
| − | |- |
||
| − | + | ! colspan="1" style="text-align:center;" |Difficulty |
|
| + | ! colspan="1" style="text-align:center;" |Best Drops |
||
| − | |} |
||
| + | ! colspan="1" style="text-align:center;" |Approx. Hr Profit |
||
| − | |||
| − | |||
| − | The [[File:Crystal_key_chest.png|30px]]Crystal Key chest located in the Soulroom and many other locations around Dreamscape can be opened using a [[File:Crystal_Key.png|21px]][[Crystal key]]. Some of the rewards include [[File:Dragonbone Melee Platebody (U)-0.png|30px]][[Dragonbone Melee Set]], [[File:Double XP Ring.png|18px]][[Double XP Ring]]s, [[File:Mystery Box.png|20px]] [[Mystery box]]s etc. |
||
| − | {| class="wikitable sortable jquery-tablesorter" style="border-color:red;font-size:13px;line-height:21px;width:600px;style=" cellpadding="2" cellspacing="0" text-align:center; " |
||
| − | |- |
||
| − | ! colspan="2" style="text-align:center;" |Crystal Key Chest |
||
| − | |- |
||
| − | |style="text-align:center;" |[[File:Crystal Chest.png|center]] |
||
| − | |} |
||
| − | |||
| − | == Upgrading == |
||
| − | One of the most appealing features we have on DreamScape is the ability to add [[File:Dragonbone_Platebody.png|25px]][[File:Dragonbone_Platebody_(u).png|30px]][[Upgrades]] to our items (Armour, Weapons, Ranks). This mechanic allows harder-to-find items to enter the game more easily, and keeps common, cheap items circulating in order to hold a stable economy. To go to the upgrading location use the command (::upgrade). |
||
| − | |||
| − | {| class="wikitable dropstable mw-collapsible mw-collapsed rdtable" style="text-align:center" cellpadding="3" cellspacing="0" data-expandtext="show" data-collapsetext="hide" |
||
| − | ! colspan="10" style="min-width:250px" |Upgrade List Example |
||
| − | |- |
||
| − | ! scope="col" style="text-align:center;" |Upgradeable Item |
||
| − | ! scope="col" style="text-align:center;" |Difficulty |
||
| − | ! scope="col" style="text-align:center;" |Resulting Item |
||
| − | |- |
||
| − | |[[Virtus Mask]] |
||
| − | [[File:Virtus Mask-0.png|center|45x45px]] |
||
| − | |''Hard'' |
||
| − | |[[Elite Virtus Mask]] |
||
| − | [[File:Elite Virtus Mask.png|center|45x45px]] |
||
| − | |- |
||
| − | |[[Virtus Robe Top]] |
||
| − | [[File:Virtus Robe Top-0.png|center|45x45px]] |
||
| − | |''Hard'' |
||
| − | |[[Elite Virtus Top]] |
||
| − | [[File:Elite Virtus Robe Top.png|center|45x45px]] |
||
| − | |- |
||
| − | |[[Virtus Robe Legs]] |
||
| − | [[File:Virtus Robe Legs-0.png|center|45x45px]] |
||
| − | |''Hard'' |
||
| − | |[[Elite Virtus Legs]] |
||
| − | [[File:Elite Virtus Robe Legs.png|center|45x45px]] |
||
| − | |- |
||
| − | |[[Dragonbone Melee Helm]] |
||
| − | [[File:Dragonbone Melee Helm.png|center|45x45px]] |
||
| − | |''Medium'' |
||
| − | |[[Dragonbone Melee Helm (U)]] |
||
| − | [[File:Dragonbone Melee Helm (u)-0.png|center|45x45px]] |
||
| − | |- |
||
| − | |[[Dragonbone Melee Platebody]] |
||
| − | [[File:Dragonbone Melee Platebody.png|center|45x45px]] |
||
| − | |''Medium'' |
||
| − | |[[Dragonbone Melee Platebody (U)]] |
||
| − | [[File:Dragonbone Melee Platebody (U)-0.png|center|45x45px]] |
||
| − | |- |
||
| − | |[[Dragonbone Melee Platelegs]] |
||
| − | [[File:Dragonbone Melee Platelegs.png|center|45x45px]] |
||
| − | |''Medium'' |
||
| − | |[[Dragonbone Melee Platelegs (U)]] |
||
| − | [[File:Dragonbone Melee Platelegs (U).png|center|45x45px]] |
||
| − | |- |
||
| − | |[[American Torva Helm]] |
||
| − | [[File:American Torva Helm.png|center|45x45px]] |
||
| − | |''Hard'' |
||
| − | |[[American Torva Helm (u)]] |
||
| − | [[File:American Torva Helm (u).png|center|45x45px]] |
||
| − | |- |
||
| − | |[[American Torva Platebody]] |
||
| − | [[File:American Torva Platebody.png|center|45x45px]] |
||
| − | |''Hard'' |
||
| − | |[[American Torva Platebody (u)]] |
||
| − | [[File:American Torva Platebody (u).png|center|45x45px]] |
||
| − | |- |
||
| − | |[[American Torva Platelegs]] |
||
| − | [[File:American Torva Platelegs.png|center|45x45px]] |
||
| − | |''Hard'' |
||
| − | |[[American Torva Platelegs (u)]] |
||
| − | [[File:American Torva Platelegs (u).png|center|45x45px]] |
||
| − | |- |
||
| − | |[[American Pernix Cowl]] |
||
| − | [[File:American Pernix Cowl.png|center|45x45px]] |
||
| − | |''Hard'' |
||
| − | |[[American Pernix Cowl (u)]] |
||
| − | [[File:American Pernix Cowl (u)-0.png|center|45x45px]] |
||
| − | |- |
||
| − | |[[American Pernix Body]] |
||
| − | [[File:American Pernix Body.png|center|45x45px]] |
||
| − | |''Hard'' |
||
| − | |[[American Pernix Body (u)]] |
||
| − | [[File:American Pernix Body (u)-0.png|center|45x45px]] |
||
| − | |- |
||
| − | |[[American Pernix Chaps]] |
||
| − | [[File:American Pernix Chaps.png|center|45x45px]] |
||
| − | |''Hard'' |
||
| − | |[[American Pernix Chaps (u)]] |
||
| − | [[File:American Pernix Chaps (u).png|center|45x45px]] |
||
| − | |- |
||
| − | |[[American Virtus Mask]] |
||
| − | [[File:American Virtus Mask.png|center|45x45px]] |
||
| − | |''Hard'' |
||
| − | |[[American Virtus Mask (u)]] |
||
| − | [[File:American Virtus Mask (u)-0.png|center|45x45px]] |
||
| − | |- |
||
| − | |[[American Virtus Robe Top]] |
||
| − | [[File:American Virtus Robe Top.png|center|45x45px]] |
||
| − | |''Hard'' |
||
| − | |[[American Virtus Robe Top (u)]] |
||
| − | [[File:American Virtus Robe Top (u)-0.png|center|45x45px]] |
||
| − | |- |
||
| − | |[[American Virtus Robe Legs]] |
||
| − | [[File:American Virtus Robe Legs.png|center|45x45px]] |
||
| − | |''Hard'' |
||
| − | |[[American Virtus Robe Legs (u)]] |
||
| − | [[File:American Virtus Robe Legs (u)-0.png|center|45x45px]] |
||
| − | |} |
||
| − | |||
| − | |-|Beginner= |
||
| − | By beginning your adventure in Dreamscape, your going to be starting off with some minor gear that is only supposed to be with you for a small period of time. We need to get you something better ASAP! Begin by trying the following monsters at the [[Train Teleport]] (::train) to earn some better gear, items such as the [[File:Crystal Key.png|25px]][[Crystal key]] and overall gaining experience to your combat stats. |
||
| − | |||
| − | You may notice that killing these monsters are taking alot of time, and 750 points for a piece of armour is going to take you forever. Gather your collected [[File:Crystal Key.png|25px]][[Crystal key]]s and head over to the Soul room (::soulroom) where you can use the Crystal Key Chest to gain some juicy rewards. |
||
| − | Here is an example of gear that you should be trying to achieve if getting enough points is taking too long. The items seen below are all from the [[File:Crystal_key_chest.png|25px]]Crystal Key Chest and or [[File:Mystery_Box.png|15px]][[Mystery box]]s. |
||
| − | {| class="wikitable sortable jquery-tablesorter" style="border-color:red;font-size:13px;line-height:21px;width:600px;style=" cellpadding="2" cellspacing="0" text-align:center; " |
||
| − | |- |
||
| − | ! colspan="2" style="text-align:center;" |Gear Setups |
||
| − | |- |
||
| − | |style="text-align:center;" |[[File:Flame_Torva_Gear_Setup.jpg|center]] |
||
| − | |style="text-align:center;" |[[File:Flame_Pernix_Gear_Setup.jpg|center]] |
||
| − | |} |
||
| − | |||
| − | == Train Teleport == |
||
| − | {| class="wikitable dropstable mw-collapsible mw-collapsed rdtable" style="text-align:center" cellpadding="3" cellspacing="0" data-expandtext="show" data-collapsetext="hide" |
||
| − | ! colspan="10" style="min-width:250px" |Click Here To View Monsters/Points |
||
| − | |- |
||
| − | ! colspan="2" style="text-align:center;" |Monsters |
||
| − | ! style="text-align:center;" |Points |
||
|- |
|- |
||
|style="text-align:center;" |[[File:Optimus_prime.png|center|50px]] |
|style="text-align:center;" |[[File:Optimus_prime.png|center|50px]] |
||
| − | |style="text-align:center;" |[[ |
+ | |style="text-align:center;" |[[Train Teleport]] |
| − | |style="text-align:center;" | |
+ | |style="text-align:center;" |::train |
| + | |style="text-align:center;" |Starter |
||
| − | |- |
||
| − | |style="text-align:center;" |[[File: |
+ | |style="text-align:center;" |[[File:Novice-circle.png]]Novice |
| − | |style="text-align:center;" |[[ |
+ | |style="text-align:center;" |[[File:Crystal_Key.png|center|20px]][[Crystal key]]s |
| − | |style="text-align:center;" | |
+ | |style="text-align:center;" |2M |
|- |
|- |
||
|style="text-align:center;" |[[File:Penguin.png|center]] |
|style="text-align:center;" |[[File:Penguin.png|center]] |
||
| − | |style="text-align:center;" |[[Penguin]] |
+ | |style="text-align:center;" |[[Penguin]]s |
| − | |style="text-align:center;" | |
+ | |style="text-align:center;" |::mbox |
| + | |style="text-align:center;" |Starter |
||
| + | |style="text-align:center;" |[[File:Novice-circle.png]]Novice |
||
| + | |style="text-align:center;" |[[File:Clue scroll.png|center|25px]][[Clue scrolls]] |
||
| + | |style="text-align:center;" |1M-50M |
||
|- |
|- |
||
| − | |style="text-align:center;" |[[File: |
+ | |style="text-align:center;" |[[File:Groudon.png|center|56px]] |
| − | |style="text-align:center;" |[[ |
+ | |style="text-align:center;" |[[Groudon]] |
| − | |style="text-align:center;" | |
+ | |style="text-align:center;" |Boss Teleport |
| + | |style="text-align:center;" |Flame/American |
||
| + | |style="text-align:center;" |[[File:Novice-circle.png]]Novice |
||
| + | |style="text-align:center;" |[[File:Trix_Platebody.png|center]][[Trix Set]] |
||
| + | |style="text-align:center;" |500k |
||
|- |
|- |
||
| − | |style="text-align:center;" |[[File: |
+ | |style="text-align:center;" |[[File:Icy_skeleton.png|center|50px]] |
| − | |style="text-align:center;" |[[ |
+ | |style="text-align:center;" |[[Icy Skeleton]] |
| − | |style="text-align:center;" | |
+ | |style="text-align:center;" |Boss Teleport |
| + | |style="text-align:center;" |Flame/American |
||
| + | |style="text-align:center;" |[[File:Novice-circle.png]]Novice |
||
| + | |style="text-align:center;" |[[File:Blizzard_Virtus_Top.png|43px]][[Blizzard Set]] |
||
| + | |style="text-align:center;" |500k |
||
|- |
|- |
||
| − | + | ! colspan="3" style="text-align:center;" |AFK Money |
|
| − | + | ! colspan="1" style="text-align:center;" |Minimum required level |
|
| − | + | ! colspan="1" style="text-align:center;" |Difficulty |
|
| + | ! colspan="1" style="text-align:center;" |Approx. Non Donator Hr Profit |
||
| + | ! colspan="1" style="text-align:center;" |Approx. Donator Hr Profit |
||
|- |
|- |
||
| − | |style="text-align:center;" |[[File: |
+ | |style="text-align:center;" |[[File:Woodcutting-icon.png|center]][[Woodcutting]] |
| − | |style="text-align:center;" |[[ |
+ | |style="text-align:center;" |[[File:Fishing1.png|center|37px]][[Fishing]] |
| + | |style="text-align:center;" |[[AFK Island |::afk]] |
||
|style="text-align:center;" |1 |
|style="text-align:center;" |1 |
||
| + | |style="text-align:center;" |[[File:Novice-circle.png]]Novice |
||
| + | |style="text-align:center;" |500K |
||
| + | |style="text-align:center;" |1000K |
||
|- |
|- |
||
| − | + | ! colspan="8" style="text-align:center;" |Obtain Atleast 1 of the Following Before Advancing to Intermediate |
|
| − | |style="text-align:center;" |[[Mario]] |
||
| − | |style="text-align:center;" |1 |
||
|- |
|- |
||
| − | + | ! colspan="8" style="text-align:center;" |The following sets are ordered from least to most efficient. |
|
| − | |style="text-align:center;" |[[Knuckles]] |
||
| − | |style="text-align:center;" |1 |
||
|- |
|- |
||
| − | |style="text-align:center;" |[[File:Arcade_Crash_Bandicoot2_outlined.png|center|50px]] |
||
| − | |style="text-align:center;" |[[Crash Bandicoot]] |
||
| − | |style="text-align:center;" |1 |
||
| − | |- |
||
| − | |style="text-align:center;" |[[File:Thugbob.png|center|50px]] |
||
| − | |style="text-align:center;" |[[Thugbob]] |
||
| − | |style="text-align:center;" |1 |
||
| − | |} |
||
| + | |style="text-align:center;" |[[File:Flame_Torva_Set.png|center|40px]] [[Flame Torva Set]][[File:Ice_katana.png|center|50px]] [[Ice Katana]] |
||
| − | Each kill grants you 1-2 points. Save enough and you'll be able to use much better gear at a very low period of time. |
||
| + | |style="text-align:center;" |[[File:Flame_Pernix.png|center|50px]] [[Flame Pernix Set]] [[File:Assault_Rifle.png|center|50px]] [[Assault Rifle]] |
||
| − | {| class="wikitable sortable jquery-tablesorter" style="border-color:red;font-size:13px;line-height:21px;width:600px;style=" cellpadding="2" cellspacing="0" text-align:center; " |
||
| + | |style="text-align:center;" |[[File:Flame_Virtus_Equipped.png|40px]] [[Flame Virtus Set]] [[File:Penguin_Staff_(u).png|center|40px]] [[Penguin Staff (U)]] |
||
| − | |- |
||
| + | |style="text-align:center;" |[[File:American_Torva_Set_Equiped.png|center|50px]] [[American Torva Set]][[File:Golden_Katana.png|center|40px]] [[Golden Katana]] |
||
| − | ! colspan="2" style="text-align:center;" |Train Teleport Rewards |
||
| + | |style="text-align:center;" |[[File:American_Pernix_Sets.png|center]] [[American Pernix Set]][[File:Golden_AK47.png|center|40px]] [[Golden Ak-47]] |
||
| − | |- |
||
| − | |style="text-align:center;" |[[File: |
+ | |style="text-align:center;" |[[File:American_Virtus_Set_Equiped.png|center|50px]] [[American Virtus Set]] [[File:Soulflare.png|center|40px]] [[Soulflare]] |
| + | |style="text-align:center;" |[[File:Trix_set.png|center]] [[Trix Set]][[File:Oblivion_Scythe.png|center]] [[Oblivion Scythe]] |
||
| + | |style="text-align:center;" |[[File:Blizzard_Virtus.png|center]] [[Blizzard Set]] [[File:Frostbite_Staff.png|center]] [[Frostbite Staff]] |
||
|} |
|} |
||
| − | == |
+ | == Intermediate == |
| + | The intermediate stages include farming revenants, a few bosses, and raids. |
||
| − | Okay, assuming you've done that first step and have gotten some better gear you'll now want to get a good weapon! If you haven't its okay. Try the [[Penguin]]s location (::mbox). Penguins reward players [[File:Penguin_Bones.png|20px]][[Penguin Bones]], [[File:DSCoin.png|25px]]DSCoins, [[File:Crystal_Key.png|23px]][[Crystal key]]s, [[File:Mystery_Box.png|19px]][[Mystery box]]s, and weapons such as the [[File:Glock.png]][[Glock]] and the [[File:Penguin_Staff_(u).png|40px]][[Penguin Staff (U)]]. |
||
| + | *Killing Revenants allow you to farm for pk points to spend at the wilderness shop. |
||
| + | *Some mid-game bosses have great drop tables to upgrade your gear! |
||
| + | *Raids are the doorway to many of the best items in the games such as the dream sets and arrav set! |
||
| + | *As a wonderful reward for taking the time to read this guide, now is a great time to tell you about how donating can give you huge boosts on gear! The [https://dreamscape317.net/store/store.php?id=54 Donation Store] has amazing offers on end game items and mystery boxes that can give amazing items. For reading this guide, use this 5% discount code (wikilife123) on your next donation! |
||
| + | *This is also a great time to start looking into [[Pets]] |
||
| + | *Investing in a [[File:Necromancer_Jr.png|30px]][[Necromancer Jr]] or [[File:Diablo_JR.png|40px]][[Diablo JR]] is highly recommended as these pets heal you as you kill NPCs! This will keep you alive even in sticky situations. |
||
| + | *While fighting at Revenants, make sure you are wearing a [[File:Bracelet_of_Ethereum.png|32px]][[Bracelet of Ethereum]]. It specifically prevents revenant damage. |
||
| − | Penguins not only is a good place to start out training, but its an excellent source for [[Money Making]] too. Other items you may get are [[File:Scroll.png|22px]]Elite/Dream [[Clue scrolls]], [[File:Xebos_Invitation.png|26px]][[Xebos Invitation]]s and [[File:Infinity_Key.png|26px]][[Infinity Key]]s. |
||
| + | *If you get any [[File:Mysterious_Emblem_Tier8.png]]Mysterious emblems, you will want to sell it to the [[Wilderness Shop]] for points. In order to maximize efficiency, trade in your mysterious emblems when they reach tier 3, then start back over. |
||
| + | *Save up to either donate for a [[File:Collectors_Necklace.png]][[Collector's Necklace]] or buy one from the ::market. A collectors necklace collects your drops and automatically stores it in your bank. |
||
{| class="wikitable sortable jquery-tablesorter" style="border-color:red;font-size:13px;line-height:21px;width:600px;style=" cellpadding="2" cellspacing="0" text-align:center; " |
{| class="wikitable sortable jquery-tablesorter" style="border-color:red;font-size:13px;line-height:21px;width:600px;style=" cellpadding="2" cellspacing="0" text-align:center; " |
||
|- |
|- |
||
| − | ! colspan=" |
+ | ! colspan="3" style="text-align:center;" |Boss Teleport |
| + | ! colspan="1" style="text-align:center;" |Minimum Gear |
||
| + | ! colspan="1" style="text-align:center;" |Difficulty |
||
| + | ! colspan="1" style="text-align:center;" |Best Drops |
||
| + | ! colspan="1" style="text-align:center;" |Approx. Hr Profit |
||
| + | |- |
||
| + | |style="text-align:center;" |[[File:Revenant_cyclops.png|center|29px]] |
||
| + | |style="text-align:center;" |[[Revenants]] |
||
| + | |style="text-align:center;" |Boss Teleports |
||
| + | |style="text-align:center;" |Beginner Gear |
||
| + | |style="text-align:center;" |[[File:Intermediate-circle.png]]Intermediate |
||
| + | |style="text-align:center;" |[[File:Mysterious_Emblem_Tier10.png|center]]Mysterious Emblem |
||
| + | |style="text-align:center;" |7K Revenant Points (3M-4M) |
||
|- |
|- |
||
| − | |style="text-align:center;" |[[File: |
+ | |style="text-align:center;" |[[File:Undead_Set.png|center|50px]] |
| − | |style="text-align:center;" |[[ |
+ | |style="text-align:center;" |[[Undead Lancelot]] |
| + | |style="text-align:center;" |Boss Teleports |
||
| + | |style="text-align:center;" |Intermediate Gear |
||
| + | |style="text-align:center;" |[[File:Intermediate-circle.png]]Intermediate |
||
| + | |style="text-align:center;" |[[File:Undead_Body.png|center]][[Undead Set]] |
||
| + | |style="text-align:center;" |20M |
||
|- |
|- |
||
| − | |style="text-align:center;" |[[File: |
+ | |style="text-align:center;" |[[File:Abyssal_Sire.png|center|50px]] |
| − | |style="text-align:center;" |[[ |
+ | |style="text-align:center;" |[[Abyssal Sire]] |
| + | |style="text-align:center;" |Boss Teleports |
||
| − | FAQ: AOE means area of effect. Most weapons are single attack damage. AOE means a weapon can do multiple damages to multiple NPC's at the same time. Example of other AOE weapons are [[File:Oblivion_Scythe.png|29px]][[Oblivion Scythe]], [[File:Frostbite_Staff.png|39px]][[Frostbite Staff]], [[File:BFG9000.png|20px]][[BFG9000]], [[File:Infinity_Gauntlets_Charged.png|26px]][[Infinity Gauntlet (Charged)]], and a [[File:Thumper.png|26px]][[Thumper]] |
||
| + | |style="text-align:center;" |Intermediate Gear |
||
| + | |style="text-align:center;" |[[File:Intermediate-circle.png]]Intermediate |
||
| + | |style="text-align:center;" |[[File:Crystal_(Abyssal_Sire).png|center]][[Sire Crystal]] |
||
| + | |style="text-align:center;" |27.5M |
||
|} |
|} |
||
| + | '''Disclaimer''' Hourly profit is calculated based on estimated drop rates and may not depict actual hourly profit for each person |
||
| − | == Prayer == |
||
| − | Once you've built up your status and you begin using your new gear, leveling up your [[File:Prayer1.png]][[Prayer]] needs to be your next focus. A majority of players use [[File:Soul_Split.gif]]Soulsplit as a way of keeping themselves alive. Depending on the type of weapon you have, a fast hitting ranged weapon such as an [[File:Assault_Rifle.png|39px]][[Assault Rifle]] an [[File:Ice_katana.png|31px]][[Ice Katana]] or a [[File:Penguin_Staff_(u).png|43px]][[Penguin Staff (U)]] will prevent you from dying when your HP hits 0 so as long as that prayer is activated. To change your prayer visit the [[File:Chaos_altar.png|22px]]Chaos (::altar). |
||
| + | '''Below you can see some examples of our [[Upgrades | Upgrade]] system!''' |
||
| − | Tips to level up Prayer fast: |
||
| + | *If you're feeling lucky and want to make a huge step in your gear, go to ::upgrade |
||
| − | *Use a [[File:Double_XP_Ring.png|14px]][[Double XP Ring]]. |
||
| + | *At the upgrade area you have the chance to turn some items into truly amazing gear! *'''but be careful, you can lose the items!'''* |
||
| − | *Use [[File:Bone.png|20px]]bones on an altar. |
||
| − | *Use [[File:Lamp.png]]xp lamps. |
||
| − | *Equip [[File:Third_Eye.png|25px]] Third Eye Aura. |
||
| − | *Equip [[File:Space_Invader_Jr.png|25px]] Space Invader Pet |
||
| − | == List of Easy Bosses == |
||
{| class="wikitable sortable jquery-tablesorter" style="border-color:red;font-size:13px;line-height:21px;width:600px;style=" cellpadding="2" cellspacing="0" text-align:center; " |
{| class="wikitable sortable jquery-tablesorter" style="border-color:red;font-size:13px;line-height:21px;width:600px;style=" cellpadding="2" cellspacing="0" text-align:center; " |
||
|- |
|- |
||
| − | ! colspan=" |
+ | ! colspan="7" style="text-align:center;" |Upgrade Gear Examples: Easy, Medium, Hard, Dream Rates (::upgrade) |
|- |
|- |
||
| − | |style="text-align:center;" |[[File: |
+ | |style="text-align:center;" |[[File:Soulflare.png|center]] [[Soulflare]] upgraded = [[File:Soulflare_(u).png|center]] [[Soulflare (u)]] |
| − | |style="text-align:center;" |[[File: |
+ | |style="text-align:center;" |[[File:American_Torva_Platebody.png|center]] [[American Torva Set]] upgraded = [[File:American_Torva_Platebody_(u).png|center]] [[American Torva Set (u)]] |
| + | |style="text-align:center;" |[[File:Collectors_Necklace.png|center]] [[Collector's Necklace]] upgraded = [[File:Amulet_of_blood-0.png|center]] [[Amulet of Blood]] |
||
| − | |- |
||
| − | |style="text-align:center;" |[[File: |
+ | |style="text-align:center;" |[[File:Golden_Minigun.png|center]] [[Golden Minigun]] upgraded = [[File:M4A4_Asiimov.png|center]] [[M4A4 Asiimov]] |
| − | |style="text-align:center;" |[[File: |
+ | |style="text-align:center;" |[[File:BFG9000.png|center]] [[BFG9000]] upgraded = [[File:BFG9000i.png|center]] [[BFG9000 (i)]] |
| + | |style="text-align:center;" |[[File:Emperor`s_Ring_Icon.png|center]] [[Emperor`s Ring]] upgraded = [[File:Emperor`s_Ring_i.png|center]] [[Emperor`s Ring (i)]] |
||
| − | |- |
||
| − | |style="text-align:center;" |[[File: |
+ | |style="text-align:center;" |[[File:Thanos_Pet.png|center]] [[Thanos Pet]] upgraded = [[File:Ultron_Pet_Icon.png|center]] [[Ultron Pet]] |
| − | |style="text-align:center;" |[[File:Forgotten_warriors_teleport.png|center|300px]][[Forgotten Warrior]] |
||
| − | |- |
||
| − | |style="text-align:center;" |[[File:Tormented_Demons_teleport.png|center|300px]][[Tormented Demon]] |
||
| − | |style="text-align:center;" |[[File:Phoenix_teleport.png|center|300px]][[Phoenix]] |
||
|} |
|} |
||
| − | == King Dreamer (Donator+) == |
||
| − | To have that extra level of advantage over regular players, become a [[File:Donator.png]][[Donator]] today to always be ahead of the pack! As apart of this beginner section, this next area King Dreamer is for Donators+. King Dreamer rewards players, [[File:Wolverine_Torva_Body.png|30px]][[Wolverine Torva Set]]s, [[Dream Wing Boots]] ([[File:Dreamwing_boots_melee.png|32px]]Melee,[[File:Dreamwing_boots_mage.png|32px]]Mage,[[File:Dreamwing_boots_ranged.png|32px]]Range) and an assortment of other drops. |
||
| − | {| class="wikitable dropstable mw-collapsible mw-collapsed rdtable" style="text-align:center" cellpadding="3" cellspacing="0" data-expandtext="show" data-collapsetext="hide" |
||
| − | ! colspan="10" style="min-width:250px" |<font color="red">Are you a Donator+? Click Here To View King Dreamer (::Dreamking)</font> |
||
| − | |- |
||
| − | ! colspan="2" style="text-align:center;" |King Dreamer |
||
| − | |- |
||
| − | |style="text-align:center;" |[[File:Npc_drop_table_king_dreamer.jpg|center|200px]] |
||
| − | |style="text-align:center;" |[[File:King_Dreamer_Location.jpg|center|200px]] |
||
| − | |style="text-align:center;" |[[File:Dreamwing_boots_stats.png|center|200px]] |
||
| − | |- |
||
| − | |style="text-align:center;" |[[File:Dreamwing_boots_mage_stats.png|center|200px]] |
||
| − | |style="text-align:center;" |[[File:Dreamwing_boots_melee_stats.png|center|200px]] |
||
| − | |style="text-align:center;" |[[File:Dreamwing_boots_range_stats.png|center|200px]] |
||
| − | |} |
||
| + | '''Next up is our Raids!''' |
||
| − | |-|Intermediate= |
||
| + | |||
| − | As an Intermediate player like yourself continues to grow their experience, they begin to learn new things about "whats good, and whats better". Dreamscape as custom as it is, has many ways to keep improving your combat opportunities by expanding your rank, armour, weapons, jewelry, pets and so much more. You will want to take a careful look out our [[Drop Boosters]] page which explains the types of boosts that you can get. Some provide [[File:Strength-icon_(1).png|15px]]strength, [[File:Defencee.png|20px]]defensive, [[File:Prayer1.png]]prayer etc. Everything from your rank, armour etc as previously stated can contribute to your power! |
||
| + | *By teleporting to raids (either via the raid teleport window in the magic tab or via the respective ::joinraid command) you can join other players to take on some of the most fearsome NPCs DreamScape has to offer! |
||
| + | *These raids house some of the best drops to upgrade your gear or your pad your pocketbook. |
||
| + | *The top three players in each raid will receive a random reward from the drop table for that raid. This allows end game players to carry newer players while allowing the newer players to still get drops. |
||
| + | *For newer players, it is highly recommended that you wear the blizzard set if you are getting carried by a higher player for the added luck bonus. Take a look at other Luck bonus material at [[File:Luck.png|30px]][[Luck Boosters]]. |
||
| + | *Don't fret if you don't receive any drops at first. Each time you take part in a raid kill you will earn Raid Points that can be used at the [[Raid Point Shop]] for guaranteed rewards! |
||
| + | |||
| − | In the picture below is an example of our Drop Boosters page. Make sure you take a look! |
||
{| class="wikitable sortable jquery-tablesorter" style="border-color:red;font-size:13px;line-height:21px;width:600px;style=" cellpadding="2" cellspacing="0" text-align:center; " |
{| class="wikitable sortable jquery-tablesorter" style="border-color:red;font-size:13px;line-height:21px;width:600px;style=" cellpadding="2" cellspacing="0" text-align:center; " |
||
|- |
|- |
||
| − | ! colspan=" |
+ | ! colspan="3" style="text-align:center;" |Raids Teleport |
| + | ! colspan="1" style="text-align:center;" |Minimum Gear |
||
| + | ! colspan="1" style="text-align:center;" |Difficulty |
||
| + | ! colspan="1" style="text-align:center;" |Best Drops |
||
| + | ! colspan="1" style="text-align:center;" |Approx. Hr Profit |
||
|- |
|- |
||
| − | |style="text-align:center;" |[[File: |
+ | |style="text-align:center;" |[[File:Voldemort.png|center|55px]] |
| + | |style="text-align:center;" |[[Voldemort]] |
||
| − | |} |
||
| + | |style="text-align:center;" |::joinraid1 |
||
| − | |||
| + | |style="text-align:center;" |Beginner Gear |
||
| − | Here is a list of places on our Wiki that you should visit to help with your Gear setups. |
||
| + | |style="text-align:center;" |[[File:Intermediate-circle.png]]Intermediate |
||
| − | {| class="wikitable sortable jquery-tablesorter" style="border-color:red;font-size:13px;line-height:21px;width:600px;style=" cellpadding="2" cellspacing="0" text-align:center; " |
||
| + | |style="text-align:center;" |[[File:Dream_Mage_Body.png|center]][[Dream Mage Set]] |
||
| + | |style="text-align:center;" |15M |
||
| + | |- |
||
| + | |style="text-align:center;" |[[File:Vendura.png|center]] |
||
| + | |style="text-align:center;" |[[Vendura]] |
||
| + | |style="text-align:center;" |::joinraid2 |
||
| + | |style="text-align:center;" |Beginner Gear |
||
| + | |style="text-align:center;" |[[File:Intermediate-circle.png]]Intermediate |
||
| + | |style="text-align:center;" |[[File:Avery_ring_i.png|center]][[Avery's Ring]] |
||
| + | |style="text-align:center;" |15M |
||
|- |
|- |
||
| − | + | |style="text-align:center;" |[[File:O.G._Dragon.png|center|136px]] |
|
| + | |style="text-align:center;" |[[OG Dragon]] |
||
| + | |style="text-align:center;" |::joinraid3 |
||
| + | |style="text-align:center;" |Beginner Gear |
||
| + | |style="text-align:center;" |[[File:Intermediate-circle.png]]Intermediate |
||
| + | |style="text-align:center;" |[[File:Dream_Body.png|center]][[Dream Set]] |
||
| + | |style="text-align:center;" |15M |
||
|- |
|- |
||
| − | |style="text-align:center;" |[[File: |
+ | |style="text-align:center;" |[[File:Diablo.png|center|54px]] |
| − | |style="text-align:center;" |[[ |
+ | |style="text-align:center;" |[[Diablo]] |
| + | |style="text-align:center;" |::joinraid4 |
||
| + | |style="text-align:center;" |Beginner Gear |
||
| + | |style="text-align:center;" |[[File:Intermediate-circle.png]]Intermediate |
||
| + | |style="text-align:center;" |[[File:Dream_range_body.png|center]][[Dream Range Set]] |
||
| + | |style="text-align:center;" |15M |
||
|- |
|- |
||
| − | |style="text-align:center;" |[[File: |
+ | |style="text-align:center;" |[[File:Raiden.png|center|40px]] |
| − | |style="text-align:center;" |[[ |
+ | |style="text-align:center;" |[[Raiden]] |
| + | |style="text-align:center;" |::joinraid5 |
||
| + | |style="text-align:center;" |Beginner Gear |
||
| + | |style="text-align:center;" |[[File:Intermediate-circle.png]]Intermediate |
||
| + | |style="text-align:center;" |[[File:Eternal_Crystal_Platebody.png|center]][[Crystal Set]] |
||
| + | |style="text-align:center;" |15M |
||
|} |
|} |
||
| − | == Revenants == |
||
| − | [[Revenants]] typically are in the wilderness causing you to lose items on death. They NO longer are, and it is a safe way to reward yourself with a great method for [[Money Making]]. There are a few things you should know before fighting one: You cant bring pets, or use donator prayers. It is also advisable to equip a [[File:Bracelet_of_Ethereum.png]][[Bracelet of Ethereum]] which specifically redirects Revenant damage. AOE weapons can also be used! |
||
| + | |||
| − | {| class="wikitable sortable jquery-tablesorter" style="border-color:red;font-size:13px;line-height:21px;width:600px;style=" cellpadding="2" cellspacing="0" text-align:center; " |
||
| + | '''The Arcade is great source of cape progressions!''' |
||
| − | |- |
||
| + | *The regular [[File:Infernal.png]][[Infernal Cape]] is the first target as an intermediate player. |
||
| − | ! colspan="2" style="text-align:center;" |Gear Setups |
||
| + | *The extreme arcade unlocks the [[File:Tribrid_Infernal_Cape_rainbow.png|33px]][[Tribrid Infernal Cape]], the next step for capes. |
||
| − | |- |
||
| + | *The Hell arcade is for the true elite players and unlocks the best cape in the game, the [[File:Tribrid_Inferno_Cape.png|40px]][[Tribrid Inferno Cape]]. |
||
| − | |style="text-align:center;" |[[File:Mage-rev.jpg|center|300px]] |
||
| − | |style="text-align:center;" |[[File:Rev-range.jpg|center|300px]] |
||
| − | |} |
||
{| class="wikitable sortable jquery-tablesorter" style="border-color:red;font-size:13px;line-height:21px;width:600px;style=" cellpadding="2" cellspacing="0" text-align:center; " |
{| class="wikitable sortable jquery-tablesorter" style="border-color:red;font-size:13px;line-height:21px;width:600px;style=" cellpadding="2" cellspacing="0" text-align:center; " |
||
|- |
|- |
||
| − | ! colspan=" |
+ | ! colspan="3" style="text-align:center;" |Minigames Teleport |
| + | ! colspan="1" style="text-align:center;" |Blizzard |
||
| + | ! colspan="1" style="text-align:center;" |Difficulty |
||
| + | ! colspan="1" style="text-align:center;" |Best Drops |
||
| + | ! colspan="1" style="text-align:center;" |Number of Waves |
||
|- |
|- |
||
| − | |style="text-align:center;" |[[File: |
+ | |style="text-align:center;" |[[File:Normal_Arcade_Machine.png|40px|center]] |
| − | |style="text-align:center;" |[[ |
+ | |style="text-align:center;" |Normal [[Arcade]] |
| + | |style="text-align:center;" |::arcade |
||
| − | |} |
||
| + | |style="text-align:center;" |Intermediate Gear |
||
| − | |||
| + | |style="text-align:center;" |[[File:Intermediate-circle.png]]Intermediate |
||
| − | {| class="wikitable dropstable mw-collapsible mw-collapsed rdtable" style="text-align:center" cellpadding="3" cellspacing="0" data-expandtext="show" data-collapsetext="hide" |
||
| + | |style="text-align:center;" |[[File:Infernal.png|center]][[Infernal Cape]] |
||
| − | ! colspan="10" style="min-width:250px" |Revenants Emblem Cumulative Points Vlaue |
||
| + | |style="text-align:center;" |Waves 1-50 |
||
|- |
|- |
||
| − | + | |style="text-align:center;" |[[File:Normal_Arcade_Machine.png|40px|center]] |
|
| − | + | |style="text-align:center;" |Extreme [[Arcade]] |
|
| + | |style="text-align:center;" |::arcade |
||
| + | |style="text-align:center;" |Intermediate Gear |
||
| + | |style="text-align:center;" |[[File:Intermediate-circle.png]]Intermediate |
||
| + | |style="text-align:center;" |[[File:Infernal_Mage_Cape.png|center]][[File:Infernal_Melee_Cape.png|center]][[File:Infernal_Range_Cape.png|center]][[File:Tribrid_Infernal_Cape_rainbow.png|center|33px]] |
||
| + | |style="text-align:center;" |Waves 1-55 |
||
|- |
|- |
||
| − | | |
+ | |style="text-align:center;" |[[File:Normal_Arcade_Machine.png|40px|center]] |
| − | | |
+ | |style="text-align:center;" |Hell [[Arcade]] |
| + | |style="text-align:center;" |::arcade |
||
| + | |style="text-align:center;" |Intermediate Gear |
||
| + | |style="text-align:center;" |[[File:Experienced-circle.png|center]]Expert |
||
| + | |style="text-align:center;" |[[File:Tribrid_Inferno_Cape.png|center|40px]][[Tribrid Inferno Cape]] |
||
| + | |style="text-align:center;" |Waves 1-55 |
||
|- |
|- |
||
| − | + | ! colspan="7" style="text-align:center;" |Obtain Atleast 1 of the Following Before Advancing to Expert |
|
| − | | style="text-align:center;"|500 |
||
|- |
|- |
||
| − | + | ! colspan="7" style="text-align:center;" |The following sets are ordered from least to most efficient |
|
| − | | style="text-align:center;"|1000 |
||
|- |
|- |
||
| − | | |
+ | |style="text-align:center;" |[[File:AmorthEquipped.png|center]] [[Am'orth Set]] [[File:Longclaw.png|center]] [[Longclaw]] |
| + | |style="text-align:center;" |[[File:Crystal_Set_1.png|center]] [[Crystal Set]] [[File:Eternal Khione's Staff.png|center]] [[Eternal Khione`s Staff]] |
||
| − | | style="text-align:center;"|1500 |
||
| + | |style="text-align:center;" |[[File:Devious_Set.png|center]][[Devious Set]] [[File:Ak-47_Asiimov.png|center]] [[Ak-47 Asiimov]] |
||
| − | |- |
||
| − | | |
+ | |style="text-align:center;" |[[File:Undead_Melee_Set.png|center]] [[Undead Set]] |
| + | [[File:Sword_of_the_protectorate.png|center]] [[Sword of the Protectorate]] |
||
| − | | style="text-align:center;"|2250 |
||
| + | |style="text-align:center;" |[[File:Crystal_Set_1.png|center]] [[Eternal Crystal Set]] [[File:Infinity Gauntlets Charged.png|center]] [[Infinity Gauntlet (Charged)]] |
||
| − | |- |
||
| − | | style="text-align:center;"|Mysterious Emblem (Tier 6) |
||
| − | | style="text-align:center;"|3000 |
||
| − | |- |
||
| − | | style="text-align:center;"|Mysterious Emblem (Tier 7) |
||
| − | | style="text-align:center;"|4000 |
||
| − | |- |
||
| − | | style="text-align:center;"|Mysterious Emblem (TIer 8) |
||
| − | | style="text-align:center;"|5000 |
||
| − | |- |
||
| − | | style="text-align:center;"|Mysterious Emblem (Tier 9) |
||
| − | | style="text-align:center;"|6000 |
||
| − | |- |
||
| − | | style="text-align:center;"|Mysterious Emblem (Tier 10) |
||
| − | | style="text-align:center;"|7000 |
||
| − | |- |
||
| − | | style="text-align:center;"|<font color="red">Advice 1:</font> You need to collect the tiers progressively. It is advisable to collect to Tier 3 and selling them, then recollect to Tier 3 and repeat. This results in the highest number of points per hour due to how steeply the drop rates fall off after Tier 3. |
||
| − | | style="text-align:center;"|<font color="red">Advice 2:</font> |
||
| − | *Donor ticket - 9k Wilderness points (Give you Regular Donor status 2m-5m) |
||
| − | *Scroll of protection - 20k Wilderness points (Gives you protection from PKERS) |
||
| − | *Tactical Boxes - 6k Wilderness points (800k-1m dscoins) |
||
| − | *Collector's Necklace - 12k Wilderness points (5m-9m dscoins) |
||
|} |
|} |
||
| − | == |
+ | == Expert == |
| + | Now that you have some better gear, it's time to start honing in on reach end game items! The following bosses have some of the best drops in game, allowing you to truly maximize money making and gear progression! |
||
| + | *As you continue to progress, advancing your pet is very important! The [[Thanos Pet]] is a great pet to add to your set up as this pet helps increase your Damage output while also healing your hitpoints and restoring your prayer! You can even upgrade this pet to a [[Ultron Pet]] for even more bonuses. |
||
| + | |||
| + | |||
{| class="wikitable sortable jquery-tablesorter" style="border-color:red;font-size:13px;line-height:21px;width:600px;style=" cellpadding="2" cellspacing="0" text-align:center; " |
{| class="wikitable sortable jquery-tablesorter" style="border-color:red;font-size:13px;line-height:21px;width:600px;style=" cellpadding="2" cellspacing="0" text-align:center; " |
||
|- |
|- |
||
| − | ! colspan=" |
+ | ! colspan="3" style="text-align:center;" |Boss Teleport |
| + | ! colspan="1" style="text-align:center;" |Minimum Gear |
||
| + | ! colspan="1" style="text-align:center;" |Difficulty |
||
| + | ! colspan="1" style="text-align:center;" |Best Drops |
||
| + | ! colspan="1" style="text-align:center;" |Approx. Hr Profit |
||
|- |
|- |
||
| − | |style="text-align:center;" |[[File: |
+ | |style="text-align:center;" |[[File:Arrav.png|center|80px]] |
| + | |style="text-align:center;" |[[Arrav]] |
||
| − | (::joinraid1) |
||
| − | |style="text-align:center;" | |
+ | |style="text-align:center;" |Boss Teleport |
| + | |style="text-align:center;" |Intermediate |
||
| − | (::joinraid2) |
||
| + | |style="text-align:center;" |[[File:Experienced-circle.png|center]]Expert |
||
| + | |style="text-align:center;" |[[File:Arrav_Body.png|center]][[Arrav Set]] |
||
| + | |style="text-align:center;" |25M |
||
|- |
|- |
||
| − | |style="text-align:center;" |[[File: |
+ | |style="text-align:center;" |[[File:Vorkath.png|center|78px]] |
| + | |style="text-align:center;" |[[Vorkath]] |
||
| − | (::joinraid3) |
||
| − | |style="text-align:center;" | |
+ | |style="text-align:center;" |Boss Teleport |
| + | |style="text-align:center;" |Intermediate |
||
| − | (::joinraid4) |
||
| + | |style="text-align:center;" |[[File:Experienced-circle.png|center]]Expert |
||
| − | |} |
||
| + | |style="text-align:center;" |[[File:Dragonfire Ward.png|center]][[Dragonfire Ward]][[File:Odium Ward.png|center]][[Odium Ward]][[File:Ancient Wyvern Shield.png|center]] [[Ancient Wyvern Shield]] |
||
| − | |||
| + | |style="text-align:center;" |N/A |
||
| − | == List of Intermediate Bosses == |
||
| + | |- |
||
| − | {| class="wikitable sortable jquery-tablesorter" style="border-color:red;font-size:13px;line-height:21px;width:600px;style=" cellpadding="2" cellspacing="0" text-align:center; " |
||
| + | |style="text-align:center;" |[[File:Skotos Equipped.png|center|80px]] |
||
| + | |style="text-align:center;" |[[Skotizo]] |
||
| + | |style="text-align:center;" |Boss Teleport |
||
| + | |style="text-align:center;" |Intermediate |
||
| + | |style="text-align:center;" |[[File:Experienced-circle.png|center]]Expert |
||
| + | |style="text-align:center;" |[[File:Skotizo Ancestral Body.png|center]] [[Skotizo Set]] |
||
| + | |style="text-align:center;" |50M |
||
|- |
|- |
||
| − | + | |style="text-align:center;" |[[File:Hades_Pet.png|80px]] |
|
| + | |style="text-align:center;" |[[Hades]]/[[Enraged Hades]] |
||
| + | |style="text-align:center;" |Boss Teleport |
||
| + | |style="text-align:center;" |Intermediate |
||
| + | |style="text-align:center;" |[[File:Experienced-circle.png|center]]Expert |
||
| + | |style="text-align:center;" |[[File:Hades Platebody.png|center]] [[Hades Set]] |
||
| + | |style="text-align:center;" |20M |
||
|- |
|- |
||
| − | + | ! colspan="7" style="text-align:center;" |Expert Gears - Non-Best in Slot |
|
| − | |style="text-align:center;" |[[File:Chaos_elemental_teleport.png|center|300px]][[Chaos elemental]] |
||
|- |
|- |
||
| + | ! colspan="7" style="text-align:center;" | The following sets are ordered from least to most efficient |
||
| − | |style="text-align:center;" |[[File:Corporeal_Beast_teleport.png|center|300px]][[Corporeal Beast]] |
||
| − | |style="text-align:center;" |[[File:Guardian_of_Am'orth_teleport.png|center|300px]][[Guardian of Am'orth]] |
||
|- |
|- |
||
| − | |style="text-align:center;" |[[File: |
+ | |style="text-align:center;" |[[File:Arrav_-_Set_-_Dreamscape.png|center]] [[Arrav Set]] [[File:Arrav_Sword.png|center]] [[Arrav Sword]] |
| − | |style="text-align:center;" |[[File: |
+ | |style="text-align:center;" |[[File:Dream_Melee_Set.png|center]] [[Dream Set | Dream Melee Set]][[File:Hades_Cleaver.png|center]] [[Hades Cleaver]] |
| + | |style="text-align:center;" |[[File:Dream_Mage_Set.png|center]][[Dream Mage Set]] [[File:Infinity_Gauntlet_(Charged).png|center]][[Infinity Gauntlet (Charged)]] |
||
| + | |style="text-align:center;" |[[File:Space_Virtus_-_Set_-_Dreamscape.png|center]] [[Space Virtus Set]][[File:Infinity_Gauntlet_(Charged).png|center]][[Infinity Gauntlet (Charged)]] |
||
| + | |style="text-align:center;" |[[File:Dream Range Set.png|center]] [[Dream Range Set]][[File:BFG9000.png|center]][[BFG9000]] |
||
|} |
|} |
||
| + | '''Disclaimer''' Hourly profit is calculated based on estimated drop rates and may not depict actual hourly profit for each person |
||
| + | == Best in Slot Equipment == |
||
| − | |-|Expert= |
||
| + | Now that you have an idea of how to progress, the following table shows the current max gear for each attack style. These items are currently the best of the best in DreamScape! The following equipment was selected based on overall DPS. (This chart excludes custom items) |
||
| − | Now that you have advanced your way through the ranks and have reached the expert stages of DreamScape, you will want to begin dialing in on what you can continue to do to advance and upgrade. With continuing updates and new gear being added and re-balanced, there is almost always room to grow and advance! |
||
| − | Lets first take a look at upgrading your current items at (::upgrade)! |
||
{| class="wikitable sortable jquery-tablesorter" style="border-color:red;font-size:13px;line-height:21px;width:600px;style=" cellpadding="2" cellspacing="0" text-align:center; " |
{| class="wikitable sortable jquery-tablesorter" style="border-color:red;font-size:13px;line-height:21px;width:600px;style=" cellpadding="2" cellspacing="0" text-align:center; " |
||
|- |
|- |
||
| − | ! colspan=" |
+ | ! colspan="6" style="text-align:center;" | Best In Slot Equipment |
|- |
|- |
||
| + | ! colspan="1" style="text-align:center;" |Range |
||
| − | |style="text-align:center;" | [[File:Upgrade_Chest.png|center|300px]] The regular [[File:Upgrade_Chest_image.png|25px]]Upgrade Chest gives you the chance to upgrade your gear to an even better option! This is a great source for some of the best upgrades in the game! |
||
| + | ! colspan="1" style="text-align:center;" |Best In Slot Item |
||
| − | |style="text-align:center;" | [[File:Emperor_Upgrade_Items.png|center|205px]] The [[File:Emperors_Chest.png|25px]]Emperor's Upgrade Chest is the source of some of the absolute best equipment in the game! Including the Best in Slot range weapons, necklace, ring and one of the best pets! |
||
| + | ! colspan="1" style="text-align:center;" |Melee |
||
| + | ! colspan="1" style="text-align:center;" |Best In Slot Item |
||
| + | ! colspan="1" style="text-align:center;" |Mage Slot |
||
| + | ! colspan="1" style="text-align:center;" |Best In Slot Item |
||
|- |
|- |
||
| + | |style="text-align:center;" | Aura |
||
| − | |} |
||
| + | |style="text-align:center;" | [[File:InfinityAura.png|30px]] [[Infinity Aura]] |
||
| − | |||
| + | |style="text-align:center;" | Aura |
||
| − | |||
| + | |style="text-align:center;" | [[File:InfinityAura.png|30px]] [[Infinity Aura]] |
||
| − | |||
| + | |style="text-align:center;" | Aura |
||
| − | == Expert Raids == |
||
| + | |style="text-align:center;" | [[File:InfinityAura.png|30px]] [[Infinity Aura]] |
||
| − | These raids have multiple stages and certain attack strategies needed to defeat them! However, the effort is worth it, as their drops are highly sought after! |
||
| − | |||
| − | {| class="wikitable sortable jquery-tablesorter" style="border-color:red;font-size:13px;line-height:21px;width:600px;style=" cellpadding="2" cellspacing="0" text-align:center; " |
||
|- |
|- |
||
| − | + | |style="text-align:center;" | Pocket |
|
| + | |style="text-align:center;" | [[File:Stone_of_Power.png|30px]] [[Stone of Power]] |
||
| + | |style="text-align:center;" | Pocket |
||
| + | |style="text-align:center;" | [[File:Stone_of_Power.png|30px]] [[Stone of Power]] |
||
| + | |style="text-align:center;" | Pocket |
||
| + | |style="text-align:center;" | [[File:Stone_of_Power.png|30px]] [[Stone of Power]] |
||
|- |
|- |
||
| − | |style="text-align:center;" | |
+ | |style="text-align:center;" | Necklace |
| + | |style="text-align:center;" | [[File:Emperor`s_Necklace_i.png|30px]] [[Emperor`s Necklace (i)]] |
||
| − | (::joinraid5) |
||
| − | |style="text-align:center;" | |
+ | |style="text-align:center;" | Necklace |
| + | |style="text-align:center;" | [[File:Emperor`s_Necklace_i.png|30px]] [[Emperor`s Necklace (i)]] |
||
| − | (::joinraid6) |
||
| + | |style="text-align:center;" | Necklace |
||
| + | |style="text-align:center;" | [[File:Emperor`s_Necklace_i.png|30px]] [[Emperor`s Necklace (i)]] |
||
|- |
|- |
||
| − | |style="text-align:center;" | |
+ | |style="text-align:center;" | Helmet |
| + | |style="text-align:center;" | [[File:Batman Mask.png|30px]] [[Batman Set | Batman Mask]] |
||
| − | (::joinraid7) |
||
| − | |style="text-align:center;" | |
+ | |style="text-align:center;" | Helmet |
| + | |style="text-align:center;" | [[File:Justiciar faceguard.png|20px]] [[Justiciar Set|Justiciar Faceguard]] |
||
| − | (Raids Teleport Interface) |
||
| + | |style="text-align:center;" | Helmet |
||
| − | |} |
||
| + | |style="text-align:center;" | [[File:Skotizo_Hat.png|30px]] [[Skotizo Set | Skotizo Hat]] |
||
| − | |||
| − | |||
| − | == List of Expert Bosses == |
||
| − | These bosses boast some of the highest hit-points but also some of the best drops! |
||
| − | |||
| − | {| class="wikitable sortable jquery-tablesorter" style="border-color:red;font-size:13px;line-height:21px;width:600px;style=" cellpadding="2" cellspacing="0" text-align:center; " |
||
|- |
|- |
||
| − | + | |style="text-align:center;" | Body |
|
| + | |style="text-align:center;" |[[File:Batman Body.png|30px]] [[Batman Set | Batman Body]] |
||
| + | |style="text-align:center;" | Body |
||
| + | |style="text-align:center;" |[[File:Justiciar chestguard.png|25px]][[Justiciar Set | Justiciar Chestguard]] |
||
| + | |style="text-align:center;" | Body |
||
| + | |style="text-align:center;" | [[File:Skotizo_Ancestral_Body.png|30px]] [[Skotizo Set | Skotizo Body]] |
||
|- |
|- |
||
| − | |style="text-align:center;" | |
+ | |style="text-align:center;" | Legs |
| − | |style="text-align:center;" |[[File: |
+ | |style="text-align:center;" | [[File:Batman Legs.png|30px]] [[Batman Set | Batman Legs]] |
| + | |style="text-align:center;" | Legs |
||
| + | |style="text-align:center;" |[[File:Justiciar legguards.png|15px]] [[Justiciar Set | Justiciar Legguards]] |
||
| + | |style="text-align:center;" | Legs |
||
| + | |style="text-align:center;" |[[File:Skotizo_Legs.png|30px]] [[Skotizo Set | Skotizo Legs]] |
||
|- |
|- |
||
| − | |style="text-align:center;" | |
+ | |style="text-align:center;" | Mainhand |
| − | |style="text-align:center;" |[[File: |
+ | |style="text-align:center;" | [[File:Descimator9000_Icon.png|30px]] [[Skull Descimator9000]] |
| + | |style="text-align:center;" | Mainhand |
||
| + | |style="text-align:center;" | [[File:Dragon Hunter Lance.png|30px]] [[Dragon Hunter Lance]] |
||
| + | |style="text-align:center;" | Mainhand |
||
| + | |style="text-align:center;" | [[File:Sanguinesti staff.png|30px]] [[Sanguinesti staff]] |
||
|- |
|- |
||
| + | |style="text-align:center;" | Offhand |
||
| − | |} |
||
| + | |style="text-align:center;" |[[File:Descimator9000_Offhand_Icon.png|30px]] [[Skull Descimator9000 Offhand]] |
||
| − | |||
| + | |style="text-align:center;" | Offhand |
||
| − | |||
| + | |style="text-align:center;" |[[File:Dragonfire Ward.png|30px]] [[Dragonfire Ward]] |
||
| − | == Arcade == |
||
| + | |style="text-align:center;" | Offhand |
||
| − | Another great source of amazing gear is the custom Arcade! Jump straight into the arcade machine and defend yourself against waves of attackers! |
||
| + | |style="text-align:center;" |[[File:Ancient Wyvern Shield.png|30px]] [[Ancient Wyvern Shield]] |
||
| − | |||
| − | {| class="wikitable sortable jquery-tablesorter" style="border-color:red;font-size:13px;line-height:21px;width:600px;style=" cellpadding="2" cellspacing="0" text-align:center; " |
||
|- |
|- |
||
| − | + | |style="text-align:center;" | Cape |
|
| + | |style="text-align:center;" | [[File:Tribrid_Inferno_Cape.png|30px]] [[Tribrid Inferno Cape]] |
||
| + | |style="text-align:center;" | Cape |
||
| + | |style="text-align:center;" | [[File:Tribrid_Inferno_Cape.png|30px]] [[Tribrid Inferno Cape]] |
||
| + | |style="text-align:center;" | Cape |
||
| + | |style="text-align:center;" | [[File:Tribrid_Inferno_Cape.png|30px]] [[Tribrid Inferno Cape]] |
||
|- |
|- |
||
| − | + | |style="text-align:center;" | Arrow |
|
| + | |style="text-align:center;" | [[File:The Power Arrow.png|30px]] [[The Power Arrow]] |
||
| + | |style="text-align:center;" | Arrow |
||
| + | |style="text-align:center;" | [[File:The Power Fist.png|30px]] [[The Power Fist]] |
||
| + | |style="text-align:center;" | Arrow |
||
| + | |style="text-align:center;" | [[File:Thepowerstone.png|30px]] [[The Power Stone]] |
||
|- |
|- |
||
| + | |style="text-align:center;" | Boots |
||
| − | |style="text-align:center;" |The [[Arcade | Regular Arcade]] is the starting area for arcade and is the source for obtaining the [[File:Infernal.png|30px]][[Infernal Cape]], a great mid-game cape! |
||
| − | |style="text-align:center;" | |
+ | |style="text-align:center;" | [[File:Ultimate_Tribrid_Boots.png|30px]] [[Ultimate Tribrid Boots]] |
| + | |style="text-align:center;" | Boots |
||
| + | |style="text-align:center;" | [[File:Ultimate_Tribrid_Boots.png|30px]] [[Ultimate Tribrid Boots]] |
||
| + | |style="text-align:center;" | Boots |
||
| + | |style="text-align:center;" | [[File:Ultimate_Tribrid_Boots.png|30px]] [[Ultimate Tribrid Boots]] |
||
|- |
|- |
||
| + | |style="text-align:center;" | Gloves |
||
| − | |style="text-align:center;" |The [[Arcade | Avengers Arcade]] is a sub-catagory of arcade that boasts some amazing rewards such as the [[File:Reality_Stone.png|22px]][[File:Space_Stone.png|22px]]infinity stones leading to the [[File:Infinity_Gauntlets_Charged.png|25px]][[Infinity Gauntlet (Charged)]] and [[File:Thanos_Pet.png|25px]][[Thanos Pet]]! |
||
| + | |style="text-align:center;" | [[File:Ferocious Gloves.png|30px]] [[Ferocious Gloves]] |
||
| − | |style="text-align:center;" |The [[Arcade | Hell Arcade]] is the apex of proving how strong you are! This arcade is very similar to the Extreme arcade but has 100x the Hitpoints! Upon completion, you will receive the [[File:Tribrid_Infernal_Cape_rainbow.png|22px]][[Tribrid Inferno Cape]], the Best in Slot cape with amazing stats! |
||
| + | |style="text-align:center;" | Gloves |
||
| + | |style="text-align:center;" | [[File:Ferocious Gloves.png|30px]] [[Ferocious Gloves]] |
||
| + | |style="text-align:center;" | Gloves |
||
| + | |style="text-align:center;" | [[File:Ferocious Gloves.png|30px]] [[Ferocious Gloves]] |
||
|- |
|- |
||
| + | |style="text-align:center;" | Ring |
||
| − | ! colspan="2" style="text-align:center;" | [[File:Arcade_reward_shop.png|center]] In addition to the amazing awards upon completion, you also receive arcade tokens to be spent in the [[Arcade | Arcade Shop]] |
||
| + | |style="text-align:center;" | [[File:Emperor`s_Ring_i.png|30px]] [[Emperor`s Ring (i)]] |
||
| + | |style="text-align:center;" | Ring |
||
| + | |style="text-align:center;" | [[File:Emperor`s_Ring_i.png|30px]] [[Emperor`s Ring (i)]] |
||
| + | |style="text-align:center;" | Ring |
||
| + | |style="text-align:center;" | [[File:Emperor`s_Ring_i.png|30px]] [[Emperor`s Ring (i)]] |
||
|} |
|} |
||
| + | </center> |
||
| − | |||
| − | ==Slayer== |
||
| − | [[File:Slayer-icon.png|21px]][[Slayer]] is a great way to help yourself progress! Upon reaching level 99 in slayer, you can chose to [[Slayer Prestige | Prestige]] your slayer! This opens the door to a damage boost while on slayer tasks and a progression of slayer shops! Upon reaching level 135 in your third prestige, you have the opportunity to enter the[[File:Strykewyrm_Shards.png|30px]][[Strykewyrm Minigame]]! This minigame is home to some of the best drop rate and luck boosting sets in the game, as well as a custom pet! |
||
| − | |||
| − | ==Karma== |
||
| − | [[Karma]] is a custom skill added that leads to great rewards! For instance, you can buy Abyssal Sire tasks and grind those Sire Crystals or you can look to the Karma shop for some of the best equipment items, including some of the Best in Slot pocket items! |
||
| − | |||
| − | |||
| − | |||
| − | |||
| − | [[Category:Starter Guides]] |
||
| − | [[Category:Market]] |
||
Revision as of 03:22, 23 October 2020

Welcome to DreamScape! DreamScape is a Custom 317 private server! Our developers and staff work to bring in custom NPCs, Armour, Weapons, and Items to make our server a unique experience! This short guide aims to familiarize you with some of our items and equipment, how to get them, and how to progress to the next stage! The guide acts as a loose guide to direct you from starting to end game!
Heres a quick video of an overlook of this guide: here
Choosing Your Gamemode
Upon joining DreamScape for the very first time, you are summoned to choose your gamemode. DreamScape offers 3 unique playstyles that will differentiate your experience. Choose wisely as all choices are final for that account!
| Type of gamemode | Additional Stats | |
|---|---|---|
| Normal | Fast skilling and combat experience | No extra Benefit |
| Hardcore | Slow skilling and combat experience | +20% Drop Rate and 5% Double Drop Rate Bonus You can remove your hardcore status ::removehardcore (This is irreversible) |
| Slow skilling and combat experience | +30% Drop Rate, 25% Luck and 5% Double Drop Rate Bonus You can't trade or use Player Owned Shops. You cant remove Ironman status | |
Beginner
- When you first begin, the first step is to finish the beginner tutorial that shows up at the top of your screen. By completing this you will be rewarded bonus drop rate!
- The first step to get a huge head start is voting for our server! Voting rewards you with a Vote Ticket for each website you vote on which can be used at our Vote Store for amazing rewards! In addition to the tickets, upon voting on all four websites, you receive a Vote Box which contains a variety of different items. You can either take your chances, or sell the box for a quick and easy 2M+ in our player owned shop system!
- Upon completion of the tutorial, head over to our ::soulroom to open your 20 crystal keys you received in your starter bundle. Opening these keys will give you a chance at some quick gear upgrades before your journey begins.
- Once you open the 20 crystal keys, head over to ::mbox and start killing penguins. The important drops you should be focusing on are: Clue Scrolls, Xebos Invitation, Mimic's Entry Ticket, Infinity Key, Crystal key, and the mystery boxes.
- Open your mystery boxes for a chance to get the
 Mystery Box Pet for extra drop rate bonus!
- If you haven't voted yet and purchased an AoE weapon, your goal is to obtain the
![]() Penguin Staff (U) from Penguins which provides AoE damage. An AoE weapon allows you to kill multiple NPCs at
once! This staff can be upgraded to the
Penguin Staff (U) from Penguins which provides AoE damage. An AoE weapon allows you to kill multiple NPCs at
once! This staff can be upgraded to the ![]() Penguin Staff (X) by using an upgrade
totem dropped by the Steroid Penguin Tank. The upgraded version deals even more damage!
Penguin Staff (X) by using an upgrade
totem dropped by the Steroid Penguin Tank. The upgraded version deals even more damage!
- Once you have an AoE weapon, you should go into the yellow portal at ::mbox and go up a level, these floors are all multi-combat which will be perfect for your new AoE weapon. You will now be able to kill multiple penguins at once making penguin farming much more efficient.
- Collect as many
 Penguin Bones as you can and bank them at the bank booth located at the center of the area.
You will use these bones on the white altar in the ::home bank to get your ![]() Prayer to at least 92 so that you can use Soulsplit. Use Soulsplit everytime you PVM to prevent you from dying.
Prayer to at least 92 so that you can use Soulsplit. Use Soulsplit everytime you PVM to prevent you from dying.
Most of your collected resource can be used at the ::soulroom
| Monster/Boss Teleport | Minimum Gear | Difficulty | Best Drops | Approx. Hr Profit | |||
|---|---|---|---|---|---|---|---|
 |
Train Teleport | ::train | Starter | 2M | |||
| Penguins | ::mbox | Starter | 1M-50M | ||||
 |
Groudon | Boss Teleport | Flame/American | 500k | |||
 |
Icy Skeleton | Boss Teleport | Flame/American | 500k | |||
| AFK Money | Minimum required level | Difficulty | Approx. Non Donator Hr Profit | Approx. Donator Hr Profit | |||
| ::afk | 1 | 500K | 1000K | ||||
| Obtain Atleast 1 of the Following Before Advancing to Intermediate | |||||||
| The following sets are ordered from least to most efficient. | |||||||
 |
 |
 |
 |
 |
 | ||
Intermediate
The intermediate stages include farming revenants, a few bosses, and raids.
- Killing Revenants allow you to farm for pk points to spend at the wilderness shop.
- Some mid-game bosses have great drop tables to upgrade your gear!
- Raids are the doorway to many of the best items in the games such as the dream sets and arrav set!
- As a wonderful reward for taking the time to read this guide, now is a great time to tell you about how donating can give you huge boosts on gear! The Donation Store has amazing offers on end game items and mystery boxes that can give amazing items. For reading this guide, use this 5% discount code (wikilife123) on your next donation!
- This is also a great time to start looking into Pets
- Investing in a Necromancer Jr or Diablo JR is highly recommended as these pets heal you as you kill NPCs! This will keep you alive even in sticky situations.
- While fighting at Revenants, make sure you are wearing a Bracelet of Ethereum. It specifically prevents revenant damage.
- If you get any Mysterious emblems, you will want to sell it to the Wilderness Shop for points. In order to maximize efficiency, trade in your mysterious emblems when they reach tier 3, then start back over.
- Save up to either donate for a Collector's Necklace or buy one from the ::market. A collectors necklace collects your drops and automatically stores it in your bank.
| Boss Teleport | Minimum Gear | Difficulty | Best Drops | Approx. Hr Profit | ||
|---|---|---|---|---|---|---|
| Revenants | Boss Teleports | Beginner Gear | 7K Revenant Points (3M-4M) | |||
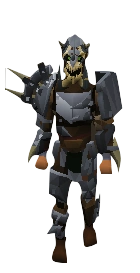 |
Undead Lancelot | Boss Teleports | Intermediate Gear | 20M | ||
 |
Abyssal Sire | Boss Teleports | Intermediate Gear | 27.5M | ||
Disclaimer Hourly profit is calculated based on estimated drop rates and may not depict actual hourly profit for each person
Below you can see some examples of our Upgrade system!
- If you're feeling lucky and want to make a huge step in your gear, go to ::upgrade
- At the upgrade area you have the chance to turn some items into truly amazing gear! *but be careful, you can lose the items!*
| Upgrade Gear Examples: Easy, Medium, Hard, Dream Rates (::upgrade) | ||||||
|---|---|---|---|---|---|---|
Next up is our Raids!
- By teleporting to raids (either via the raid teleport window in the magic tab or via the respective ::joinraid command) you can join other players to take on some of the most fearsome NPCs DreamScape has to offer!
- These raids house some of the best drops to upgrade your gear or your pad your pocketbook.
- The top three players in each raid will receive a random reward from the drop table for that raid. This allows end game players to carry newer players while allowing the newer players to still get drops.
- For newer players, it is highly recommended that you wear the blizzard set if you are getting carried by a higher player for the added luck bonus. Take a look at other Luck bonus material at Luck Boosters.
- Don't fret if you don't receive any drops at first. Each time you take part in a raid kill you will earn Raid Points that can be used at the Raid Point Shop for guaranteed rewards!
| Raids Teleport | Minimum Gear | Difficulty | Best Drops | Approx. Hr Profit | ||
|---|---|---|---|---|---|---|
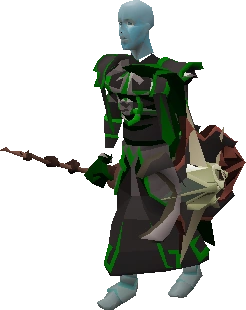 |
Voldemort | ::joinraid1 | Beginner Gear | 15M | ||
 |
Vendura | ::joinraid2 | Beginner Gear | 15M | ||
 |
OG Dragon | ::joinraid3 | Beginner Gear | 15M | ||
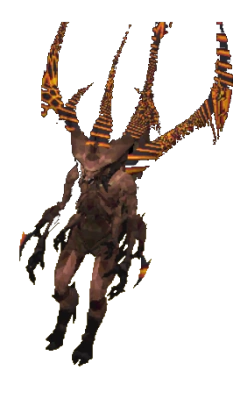 |
Diablo | ::joinraid4 | Beginner Gear | 15M | ||
| Raiden | ::joinraid5 | Beginner Gear | 15M | |||
The Arcade is great source of cape progressions!
- The regular Infernal Cape is the first target as an intermediate player.
- The extreme arcade unlocks the Tribrid Infernal Cape, the next step for capes.
- The Hell arcade is for the true elite players and unlocks the best cape in the game, the Tribrid Inferno Cape.
| Minigames Teleport | Blizzard | Difficulty | Best Drops | Number of Waves | ||
|---|---|---|---|---|---|---|
| Normal Arcade | ::arcade | Intermediate Gear | Waves 1-50 | |||
| Extreme Arcade | ::arcade | Intermediate Gear | Waves 1-55 | |||
| Hell Arcade | ::arcade | Intermediate Gear | Waves 1-55 | |||
| Obtain Atleast 1 of the Following Before Advancing to Expert | ||||||
| The following sets are ordered from least to most efficient | ||||||
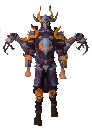 |
 |
 |
 |
| ||
Expert
Now that you have some better gear, it's time to start honing in on reach end game items! The following bosses have some of the best drops in game, allowing you to truly maximize money making and gear progression!
- As you continue to progress, advancing your pet is very important! The Thanos Pet is a great pet to add to your set up as this pet helps increase your Damage output while also healing your hitpoints and restoring your prayer! You can even upgrade this pet to a Ultron Pet for even more bonuses.
| Boss Teleport | Minimum Gear | Difficulty | Best Drops | Approx. Hr Profit | ||
|---|---|---|---|---|---|---|
 |
Arrav | Boss Teleport | Intermediate | 25M | ||
 |
Vorkath | Boss Teleport | Intermediate | N/A | ||
 |
Skotizo | Boss Teleport | Intermediate | 50M | ||

|
Hades/Enraged Hades | Boss Teleport | Intermediate | 20M | ||
| Expert Gears - Non-Best in Slot | ||||||
| The following sets are ordered from least to most efficient | ||||||
 |
 |
 |
 |
 | ||
Disclaimer Hourly profit is calculated based on estimated drop rates and may not depict actual hourly profit for each person
Best in Slot Equipment
Now that you have an idea of how to progress, the following table shows the current max gear for each attack style. These items are currently the best of the best in DreamScape! The following equipment was selected based on overall DPS. (This chart excludes custom items)