(added abyssal sire) |
(Added table/images for raids. Will fix order tomorrow.) |
||
| (6 intermediate revisions by 4 users not shown) | |||
| Line 67: | Line 67: | ||
* [[Forgotten Warrior]] |
* [[Forgotten Warrior]] |
||
* [[Frost Dragon]] |
* [[Frost Dragon]] |
||
| + | * [[Flame Pingu]] |
||
==G== |
==G== |
||
* [[Gargoyle]] |
* [[Gargoyle]] |
||
| Line 156: | Line 157: | ||
{| width="auto" |
{| width="auto" |
||
|[[File:Abyssal_sire.png|link=https://dreamscape317.fandom.com/wiki/Abyssal_Sire|right]] |
|[[File:Abyssal_sire.png|link=https://dreamscape317.fandom.com/wiki/Abyssal_Sire|right]] |
||
| ⚫ | |||
|[[File:Barrelchest1.png|link=http://dreamscape317.wikia.com/wiki/Barrelchest|right]] |
|[[File:Barrelchest1.png|link=http://dreamscape317.wikia.com/wiki/Barrelchest|right]] |
||
|[[File:Bork.png|link=http://dreamscape317.wikia.com/wiki/Bork|right]] |
|[[File:Bork.png|link=http://dreamscape317.wikia.com/wiki/Bork|right]] |
||
| ⚫ | |||
|[[File:Callisto1.png|link=http://dreamscape317.wikia.com/wiki/Callisto|right]] |
|[[File:Callisto1.png|link=http://dreamscape317.wikia.com/wiki/Callisto|right]] |
||
| ⚫ | |||
|[[File:Cerberus1.png|link=https://dreamscape317.fandom.com/wiki/Cerberus|right]] |
|[[File:Cerberus1.png|link=https://dreamscape317.fandom.com/wiki/Cerberus|right]] |
||
| ⚫ | |||
|- |
|- |
||
| ⚫ | |||
|[[File:Chaos_ele1.png|link=http://dreamscape317.wikia.com/wiki/Chaos_elemental|right]] |
|[[File:Chaos_ele1.png|link=http://dreamscape317.wikia.com/wiki/Chaos_elemental|right]] |
||
|[[File:Dagannoth.png|link=http://dreamscape317.wikia.com/wiki/Dagannoth_Kings|right]] |
|[[File:Dagannoth.png|link=http://dreamscape317.wikia.com/wiki/Dagannoth_Kings|right]] |
||
| ⚫ | |||
|- |
|- |
||
| ⚫ | |||
|[[File:Diglet_image.png|link=https://dreamscape317.fandom.com/wiki/Diglet|right]] |
|[[File:Diglet_image.png|link=https://dreamscape317.fandom.com/wiki/Diglet|right]] |
||
| ⚫ | |||
|[[File:Dbone.png|link=http://dreamscape317.wikia.com/wiki/Dragonbone_Protector|right]] |
|[[File:Dbone.png|link=http://dreamscape317.wikia.com/wiki/Dragonbone_Protector|right]] |
||
|[[File:Flame_pernix2.png|link=http://dreamscape317.wikia.com/wiki/Flame_Pernix|right]] |
|[[File:Flame_pernix2.png|link=http://dreamscape317.wikia.com/wiki/Flame_Pernix|right]] |
||
| Line 179: | Line 178: | ||
|[[File:Groudon1.png|link=https://dreamscape317.fandom.com/wiki/Groudon|right]] |
|[[File:Groudon1.png|link=https://dreamscape317.fandom.com/wiki/Groudon|right]] |
||
|[[File:Guardian_of_amorth.png|link=https://dreamscape317.fandom.com/wiki/Guardian_of_Am'orth|right]] |
|[[File:Guardian_of_amorth.png|link=https://dreamscape317.fandom.com/wiki/Guardian_of_Am'orth|right]] |
||
| ⚫ | |||
| − | |Under con |
||
|- |
|- |
||
| ⚫ | |||
|[[File:Invictus.png|link=http://dreamscape317.wikia.com/wiki/Invictus_warriors|right]] |
|[[File:Invictus.png|link=http://dreamscape317.wikia.com/wiki/Invictus_warriors|right]] |
||
|[[File:Kbd.png|link=http://dreamscape317.wikia.com/wiki/King_Black_Dragon|right]] |
|[[File:Kbd.png|link=http://dreamscape317.wikia.com/wiki/King_Black_Dragon|right]] |
||
| ⚫ | |||
|[[File:King_dreamer1.png|link=http://dreamscape317.wikia.com/wiki/King_dreamer|right]] |
|[[File:King_dreamer1.png|link=http://dreamscape317.wikia.com/wiki/King_dreamer|right]] |
||
| ⚫ | |||
|[[File:Mini_bosses.png|link=http://dreamscape317.wikia.com/wiki/Mini_Bosses|right]] |
|[[File:Mini_bosses.png|link=http://dreamscape317.wikia.com/wiki/Mini_Bosses|right]] |
||
| ⚫ | |||
|[[File:Nex1.png|link=http://dreamscape317.wikia.com/wiki/Nex|right]] |
|[[File:Nex1.png|link=http://dreamscape317.wikia.com/wiki/Nex|right]] |
||
|- |
|- |
||
|[[File:Obliv.png|link=http://dreamscape317.wikia.com/wiki/Oblivion_Dragon|right]] |
|[[File:Obliv.png|link=http://dreamscape317.wikia.com/wiki/Oblivion_Dragon|right]] |
||
|[[File:Olaf.png|link=https://dreamscape317.fandom.com/wiki/Olaf|right]] |
|[[File:Olaf.png|link=https://dreamscape317.fandom.com/wiki/Olaf|right]] |
||
| ⚫ | |||
|[[File:Party_pete.png|link=http://dreamscape317.wikia.com/wiki/Party_pete_boss|right]] |
|[[File:Party_pete.png|link=http://dreamscape317.wikia.com/wiki/Party_pete_boss|right]] |
||
| ⚫ | |||
|- |
|- |
||
| + | |[[File:Phoenix.png|link=http://dreamscape317.wikia.com/wiki/Phoenix|right]] |
||
|[[File:Revs.png|link=https://dreamscape317.fandom.com/wiki/Revenants|right]] |
|[[File:Revs.png|link=https://dreamscape317.fandom.com/wiki/Revenants|right]] |
||
| − | |Under Con |
||
| − | |Under Con |
||
| ⚫ | |||
|[[File:Scorpia.png|link=http://dreamscape317.wikia.com/wiki/Scorpia|right]] |
|[[File:Scorpia.png|link=http://dreamscape317.wikia.com/wiki/Scorpia|right]] |
||
| ⚫ | |||
|[[File:Stq.png|link=http://dreamscape317.wikia.com/wiki/Sea_Troll_Queen|right]] |
|[[File:Stq.png|link=http://dreamscape317.wikia.com/wiki/Sea_Troll_Queen|right]] |
||
|[[File:Shadow_king.png|link=http://dreamscape317.wikia.com/wiki/Shadow_King|right]] |
|[[File:Shadow_king.png|link=http://dreamscape317.wikia.com/wiki/Shadow_King|right]] |
||
| ⚫ | |||
|[[File:Tank_boss.png|link=http://dreamscape317.wikia.com/wiki/Tank_Boss|right]] |
|[[File:Tank_boss.png|link=http://dreamscape317.wikia.com/wiki/Tank_Boss|right]] |
||
| ⚫ | |||
|[[File:Tormented.png|link=http://dreamscape317.wikia.com/wiki/Tormented_Demon|right]] |
|[[File:Tormented.png|link=http://dreamscape317.wikia.com/wiki/Tormented_Demon|right]] |
||
|[[File:Torquat1.png|link=http://dreamscape317.wikia.com/wiki/Torquat|right]] |
|[[File:Torquat1.png|link=http://dreamscape317.wikia.com/wiki/Torquat|right]] |
||
| ⚫ | |||
|[[File:Venenatis1.png|link=http://dreamscape317.wikia.com/wiki/Venenatis|right]] |
|[[File:Venenatis1.png|link=http://dreamscape317.wikia.com/wiki/Venenatis|right]] |
||
| ⚫ | |||
|[[File:Vetion.png|link=http://dreamscape317.wikia.com/wiki/Vet'ion|right]] |
|[[File:Vetion.png|link=http://dreamscape317.wikia.com/wiki/Vet'ion|right]] |
||
|[[File:Vorago1.png|link=http://dreamscape317.wikia.com/wiki/Vorago|right]] |
|[[File:Vorago1.png|link=http://dreamscape317.wikia.com/wiki/Vorago|right]] |
||
| ⚫ | |||
|[[File:Wizard_grayzag.png|link=http://dreamscape317.wikia.com/wiki/Wizard_Grayzag|right]] |
|[[File:Wizard_grayzag.png|link=http://dreamscape317.wikia.com/wiki/Wizard_Grayzag|right]] |
||
| ⚫ | |||
|[[File:Zulrah1.png|link=https://dreamscape317.fandom.com/wiki/Zulrah|right]] |
|[[File:Zulrah1.png|link=https://dreamscape317.fandom.com/wiki/Zulrah|right]] |
||
| Line 223: | Line 219: | ||
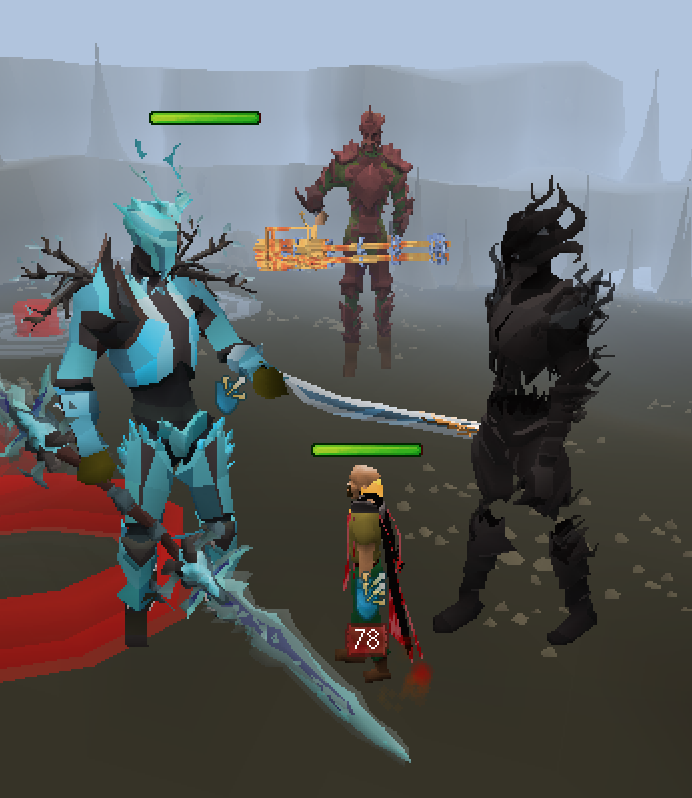
[[File:07_Skull1.png|thumb|left|48px]]Raids allow boss battles to deliver a truly amazing experience. Be prepared to step into warfare with your friends against unique and AI bosses. |
[[File:07_Skull1.png|thumb|left|48px]]Raids allow boss battles to deliver a truly amazing experience. Be prepared to step into warfare with your friends against unique and AI bosses. |
||
| + | {| class="wikitable sortable jquery-tablesorter" style="border-color:red;font-size:13px;line-height:21px;width:347px;style=" cellpadding="2" cellspacing="0" text-align:center; " |
||
| − | |||
| ⚫ | |||
| − | |||
| + | ! colspan="2" style="text-align:center;" |Raid Bosses & Difficulty |
||
| − | |||
| ⚫ | |||
| − | * Maximum of 3 rewards per kill |
||
| + | |style="text-align:center;" |[[File:Charizard_-_image.png|center]][[Charizard Raid]] |
||
| − | * 15 unique attacks |
||
| + | |style="text-align:center;" |Easy |
||
| − | * Multiple attack styles |
||
| ⚫ | |||
| − | |||
| + | |style="text-align:center;" |[[File:Voldemort.png|center|74px]][[Voldemort]] |
||
| − | * You will need your best gear when going up against these raid bosses |
||
| + | |style="text-align:center;" |Easy |
||
| − | |||
| + | |- |
||
| − | <hr /> |
||
| + | |style="text-align:center;" |[[File:Vendura.png|center]][[Vendura]] |
||
| − | [[Charizard Raid]] |
||
| + | |style="text-align:center;" |Easy |
||
| − | is a new boss for beginners to mid-level players, he drops between 1 - 200 DSCoins per kill! |
||
| + | |- |
||
| − | |||
| + | |style="text-align:center;" |[[File:Arcade_Diablo_outlined.png|center|78px]][[Diablo]] |
||
| − | [[Diablo]] |
||
| + | |style="text-align:center;" |Medium |
||
| − | The most powerful demon with a level of 5000, and an outstanding 100,000 HP! It has two very rare drops: [[Blood Santa]] and [[Devious Set]]. |
||
| + | |- |
||
| − | |||
| + | |style="text-align:center;" |[[File:Arcade_Dark_Raiden_outlined.png|center]][[Raiden]] |
||
| − | [[Raiden]] |
||
| + | |style="text-align:center;" |Hard |
||
| − | is and extremely powerful Raid boss boasting 2 forms to defeat! He will drain your HP and Prayer so it is advised to bring a healing ring or pet. The very rare drop is the 3 pieces that make up the [[Crystal Set]]. |
||
| + | |- |
||
| − | |||
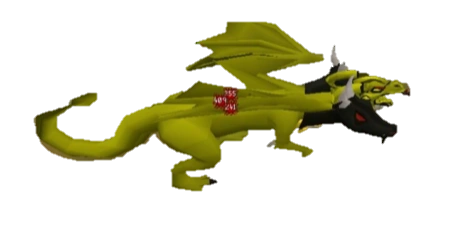
| + | |style="text-align:center;" |[[File:Og_dragon1.png|center|170px]][[O.G. Dragon]] |
||
| − | [[Ninja Turtles]] |
||
| + | |style="text-align:center;" |Hard |
||
| − | is multi-combat, and you will be facing multiple high-leveled enemies all at once! There are multiple very rare drops. |
||
| + | |- |
||
| − | |||
| + | |style="text-align:center;" |[[File:Ninja_Turtle.png|center]][[Ninja Turtles]] |
||
| − | [[O.G. Dragon]] |
||
| + | |style="text-align:center;" |Very Hard |
||
| − | is an enormous, three-headed dragon. This dragon is one if not the toughest raid boss we have. It's special is freezing its opponents. The very rare drop is the [[Electronic Katana]]. |
||
| + | |- |
||
| − | |||
| + | |style="text-align:center;" |[[File:King_kong.png|center]][[King Kong Vs Godzilla]] |
||
| − | [[Vendura]] |
||
| + | |style="text-align:center;" |Medium |
||
| − | is level 777 with 70,000 HP. This boss is very tough as it weakens its opponent's bonuses over time. The very rare drop is the [[Ascensions Crossbow]] and [[Ascensions Offhand Crossbow]]. |
||
| + | |- |
||
| − | |||
| + | |style="text-align:center;" |[[File:Hades_Pet.png|center]][[Hades/Enraged Hades]] |
||
| − | [[Voldemort]] |
||
| + | |style="text-align:center;" |Very Hard |
||
| − | is level 777 with 66,666 HP. This boss has a unique attack style such as charge attacks and draining of the prayer to its opponents. The very rare drops are the [[Elder Wand]]. |
||
| + | |- |
||
| + | |style="text-align:center;" |[[File:Trinity_bosses.png|center|142px]][[Trinity]] |
||
| + | |style="text-align:center;" |Hard |
||
| + | |- |
||
| + | |style="text-align:center;" |[[File:Theatre_of_blood.png|center]][[Theatre of Blood]] |
||
| + | |style="text-align:center;" |Hard |
||
| + | |- |
||
| + | |style="text-align:center;" |[[File:Arrav.png|center]][[Arrav]] |
||
| + | |style="text-align:center;" |Hard |
||
| + | |} |
||
|-|Wilderness= |
|-|Wilderness= |
||
| − | [[File:Wilderness_Skull.png|thumb|left|46px]]The Dreamscape Wilderness is a harsh environment but can also provide players with great rewards. In the Wilderness, a player is not safe if fighting another player/boss. Players will lose their items on death. |
+ | [[File:Wilderness_Skull.png|thumb|left|46px]]The Dreamscape Wilderness is a harsh environment but can also provide players with great rewards. In the Wilderness, a player is not safe if fighting another player/boss. Players will '''NOT lose their items on death.''' |
<hr /> |
<hr /> |
||
Revision as of 03:59, 8 March 2020

<tabber>
|-|Training=

Another common area for beginners to train at is the Mystery Box Teleport which if you can guess, Mystery Box's are a common drop, you can get there by typing ::mbox
You can also explore our Monster Teleports which also includes other areas for beginners such as Taverly Dungeon, Rock Crabs, Pointzone and more.
<tabber> |-|Monsters=

Use CTRL + F to find what you're looking for.
A
B
- Baby Blue Dragon
- Banshee
- Barrelchest
- Berserk barbarian spirit
- Black Knight
- Black demon
- Bloodveld
- Blue Dragon
- Bork Boss
- Black Dragon
C
- Callisto
- Cerberus
- Chaos Elemental
- Chaos Druid
- Chaos Dwarf
- Charmander
- Culinaromancer
- Chickens
- Corporal Beast
- Crawling hands
D
- Dagannoth Kings
- Dark Beast
- Diglet
- Dust devil
- Desert Strykewyrm
- Dharok the wretched
- Diablo
- Dragonbone Protector
E
F
G
- Gargoyle
- Guardian of armadyl
- Guardian of Am'orth
- General Graador
- Guthan the infested
- Giant Bat
- Greater Demon
- Groudon
- Gio's Hoe
H
I
- Ice Strykewyrm
- Ice gaint
- Icy Skeleton
- Invictus Warriors
- Infernal mage
J
K
- Karil the tainted
- King Black Dragon
- King Dreamer
L
M
- Magic axe
- Mini Bosses
- Moss Giant
- [[c
N
- Nex
- Nechryael
O
P
- Party pete boss
- Penguins
- Penance fighter
- Penance ranger
- Pikachu
- Phoenix
Q
R
S
- Scorpia
- Solus dellager
- Sea Troll Queen
- Shadow King
- Skeleton
- Steroid penguin tank
T
- Tank Boss
- Thugbob
- Tormented Demon
- Tzhaar xil
- Torag the corrupted
- Torquat
U
V
W
X
Y
Z
<tabber> |-|Bosses= When it comes to bossing, Dreamscape has the best-bossing experience! Dreamscape has 30 Bosses, and 15 of those are custom. Each with their own unique rewards.
If you'd like to understand how drop rates work on Dreamscape view this guide.


<tabber>


 |
 |
 |
 |
 |
 |
 |
 |
 |
 |
 |
 |
 |
 |
 |
 |
 |
 |
 |
 |
 |
 |
 |
 |
 |
 |
 |
 |
 |
 |
 |
 |
 |
 |
 |
 |
 |
 |
 |

|
| Raid Bosses & Difficulty | |
|---|---|
 |
Easy |
 |
Easy |
 |
Easy |
 |
Medium |
 |
Hard |
 |
Hard |
 |
Very Hard |
| Medium | |
 |
Very Hard |
 |
Hard |
 |
Hard |
 |
Hard |

The Bosses which are located in the heart of Dreamscape's wilderness are:
Scorpia is yet another easy boss located in wilderness level 53. The best loot that can be obtained is a Gold Chain. It also drops other good rewards such as a Shadow Cleaver.
Revenants a great money making method by selling the emblems that they drop to the Wilderness Shop and buying items that best suit your needs.
Vorago is the most powerful boss around Dreamscape. The best loot that can be obtained is the Maul Of Omens. It also has many other great rewards such as Kronic Dragon Wings, and custom Santa hats.
Venenatis is one of the easier bosses. Venenatis can be located in wilderness level 27. The best loot that can be obtained is a Venenatis Egg.